Powerplatform Azure Devops Step By Step Guide
DevOps Solution for Microsoft Power Platform
A step-by-step guide on the continuous delivery in Power Platform using Azure DevOps.
No-code solutions are great, and the scenarios enabled by those platforms are constantly growing. But we all know that with great power comes great responsibility.
When your no-code solution becomes productive, and many people rely on it, then it is about time to introduce more professional disciplines like source control and continuous delivery.
This article explains how to automatically check-in a no-code Solution into source control and deploy it using a continuous delivery approach with help of Azure DevOps.
note: Solutions
The steps described below are not related to which assets Solution contains, so they are valid for whatever kind of Solution we should take in consideration
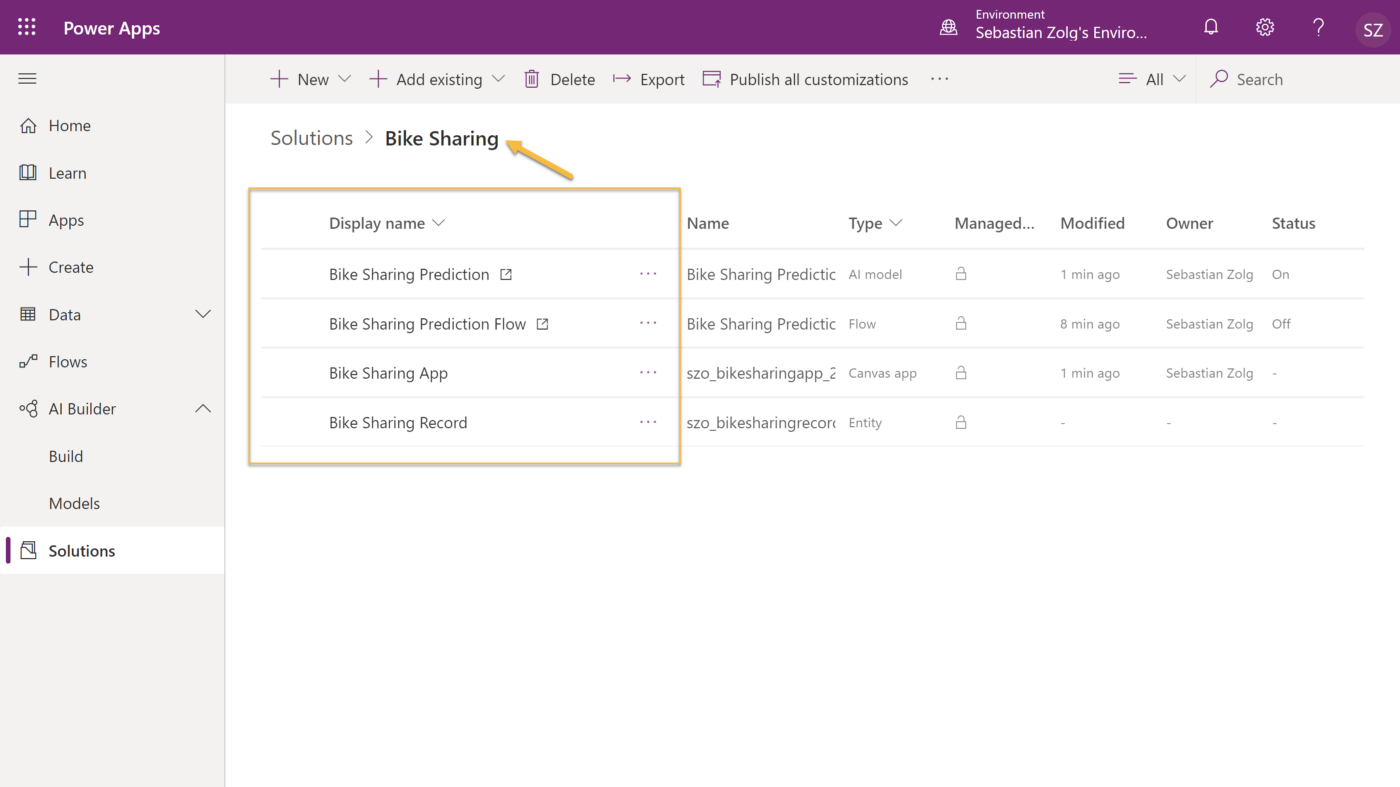
info: Solution for the PoC In our case such a Solution contains the AI prediction model, the underlying entities, an App to visualize data, and a workflow that invokes the prediction model when new data arrives.
All these components where build using the Microsoft Power Platform.
This step-by-step guide explains the following:
- Export Solution from a dev environment.
- Check-in of the exported solution into a git repository.
- Deploy the solution to a different environment.
Assembling the Solution in Power Platform
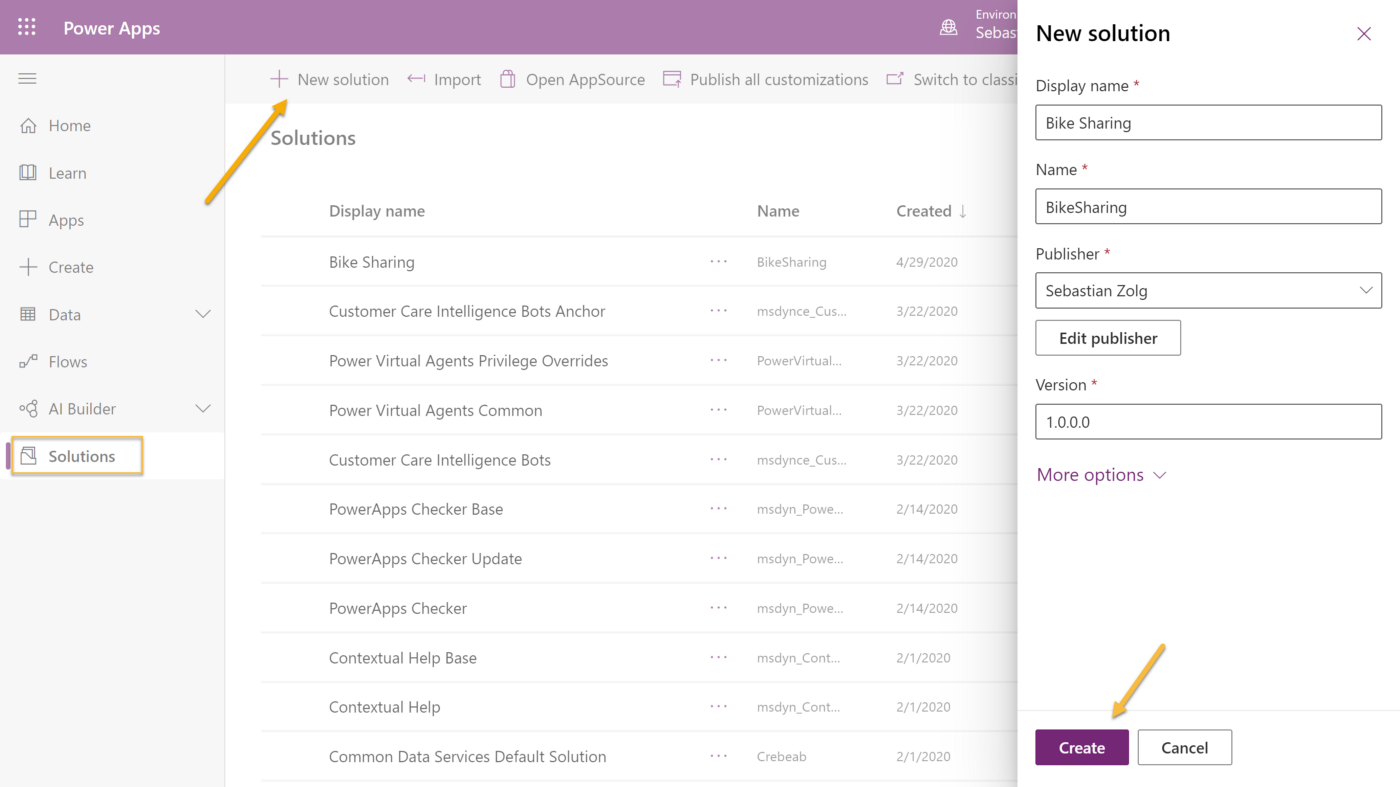
Assuming that we have created a solution as shown in picture below.
And we have added some assets within it
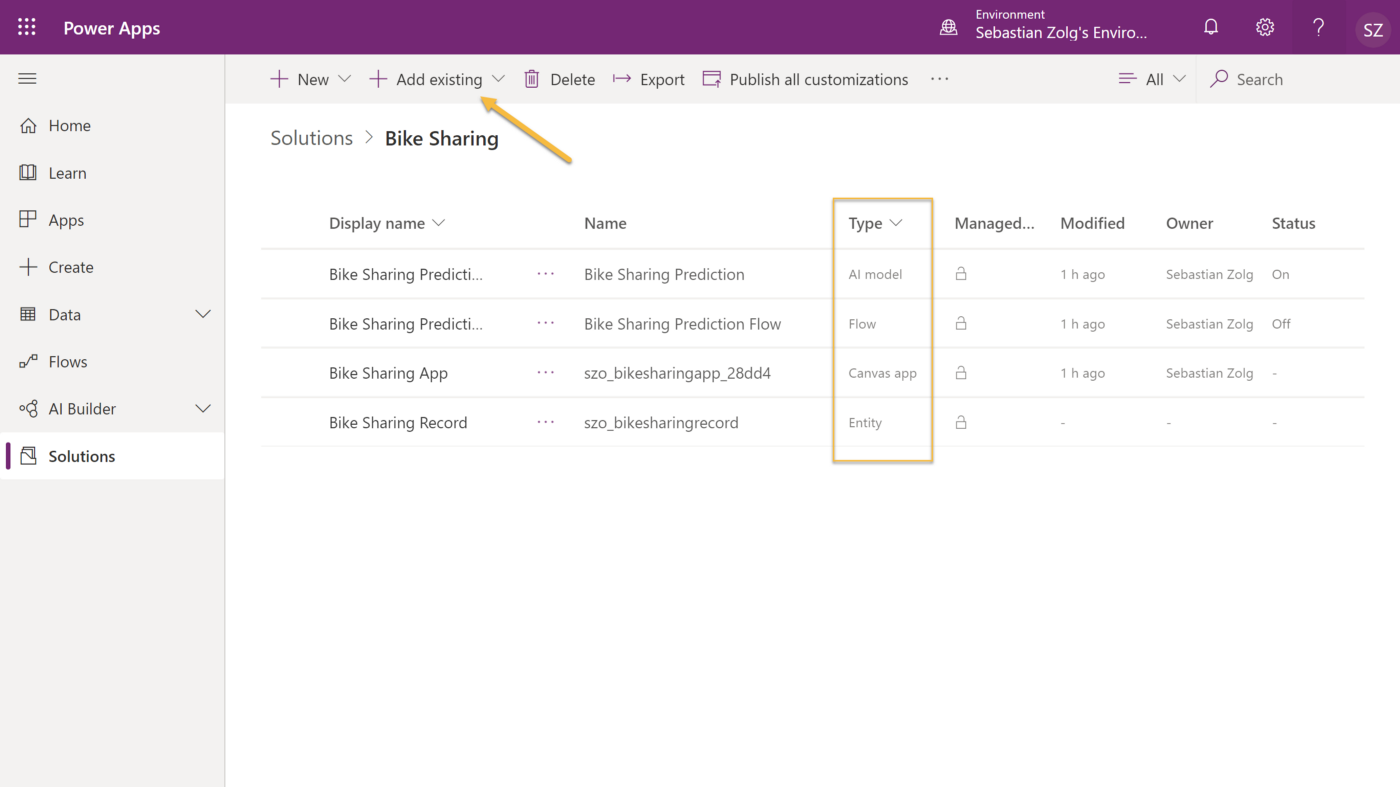
Now we have a solution that contains everything we want to put under source control and make it deployable to other environments.
Creating the check-in Pipeline
Next, we create our check-in pipeline, which sole purpose is to export the previously created solution from its source environment and put it into our git repository.
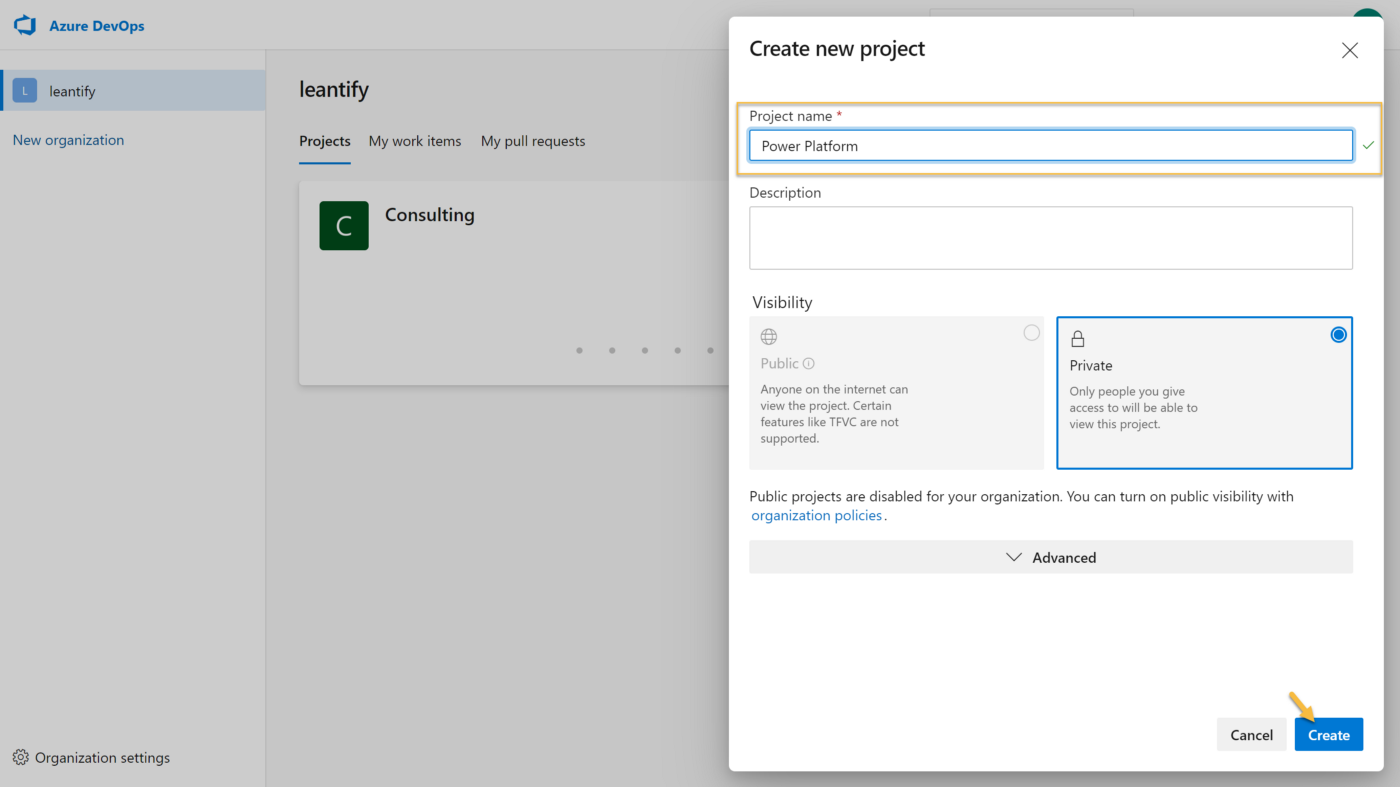
Create a new project in Azure DevOps.
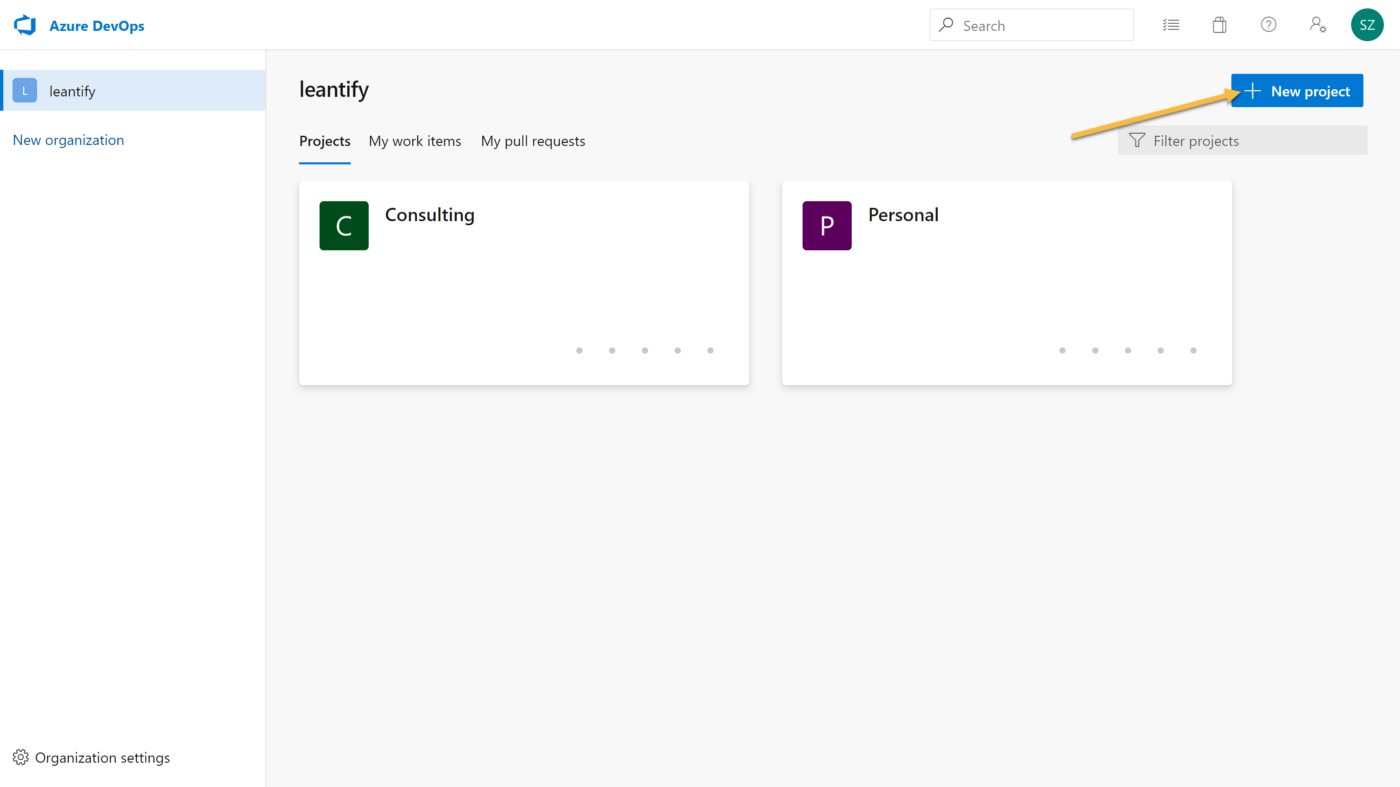
Name it Power Platform and click Create.
As a first step, we have to initialize our git repository inside this new project. For this, we go to Repos > File and click the Initialize button below. This simply commits a nice README.md into the repository. Feel free to update the file and explain what this project does.

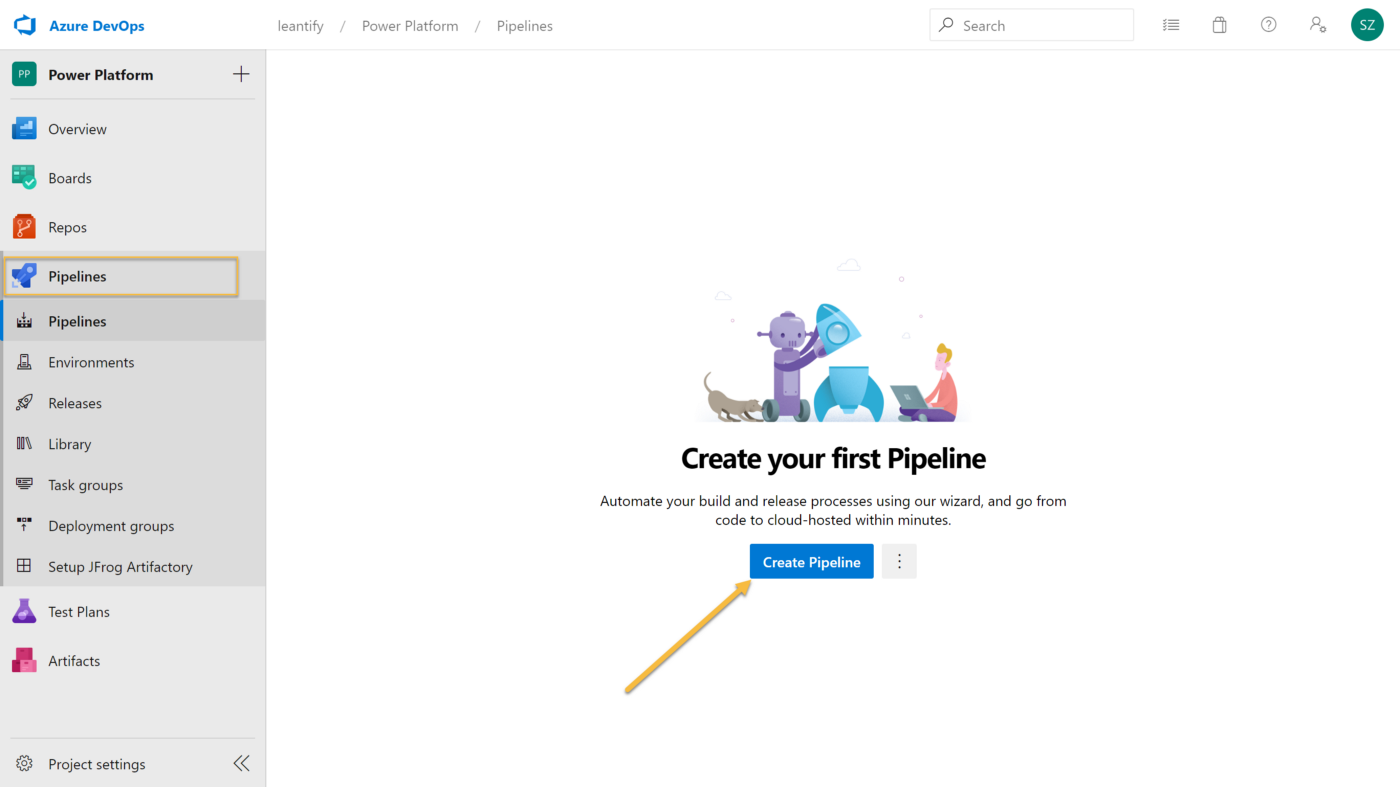
Now we can create the check-in Pipeline. To do so, go to Pipelines and click Create Pipeline.
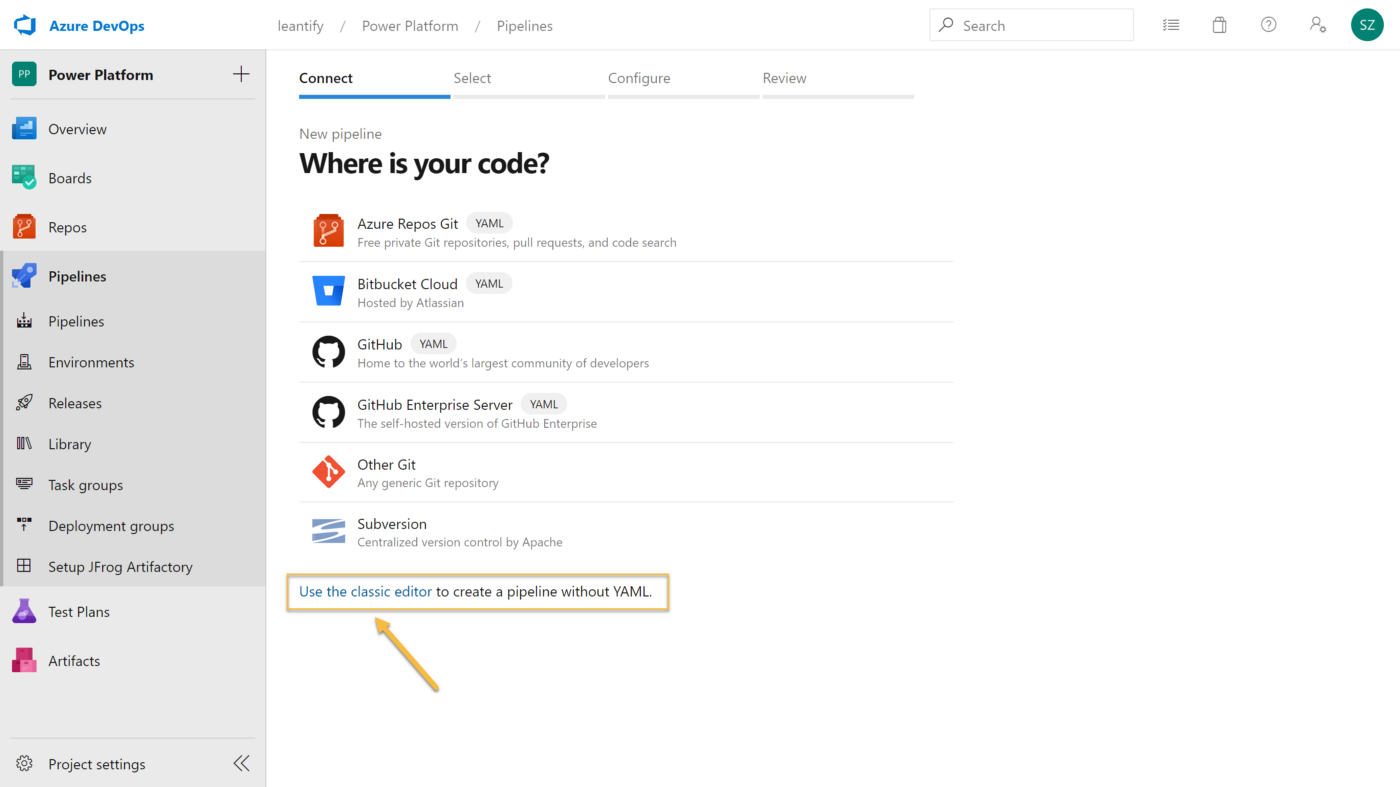
Click the Use the classic editor link below.
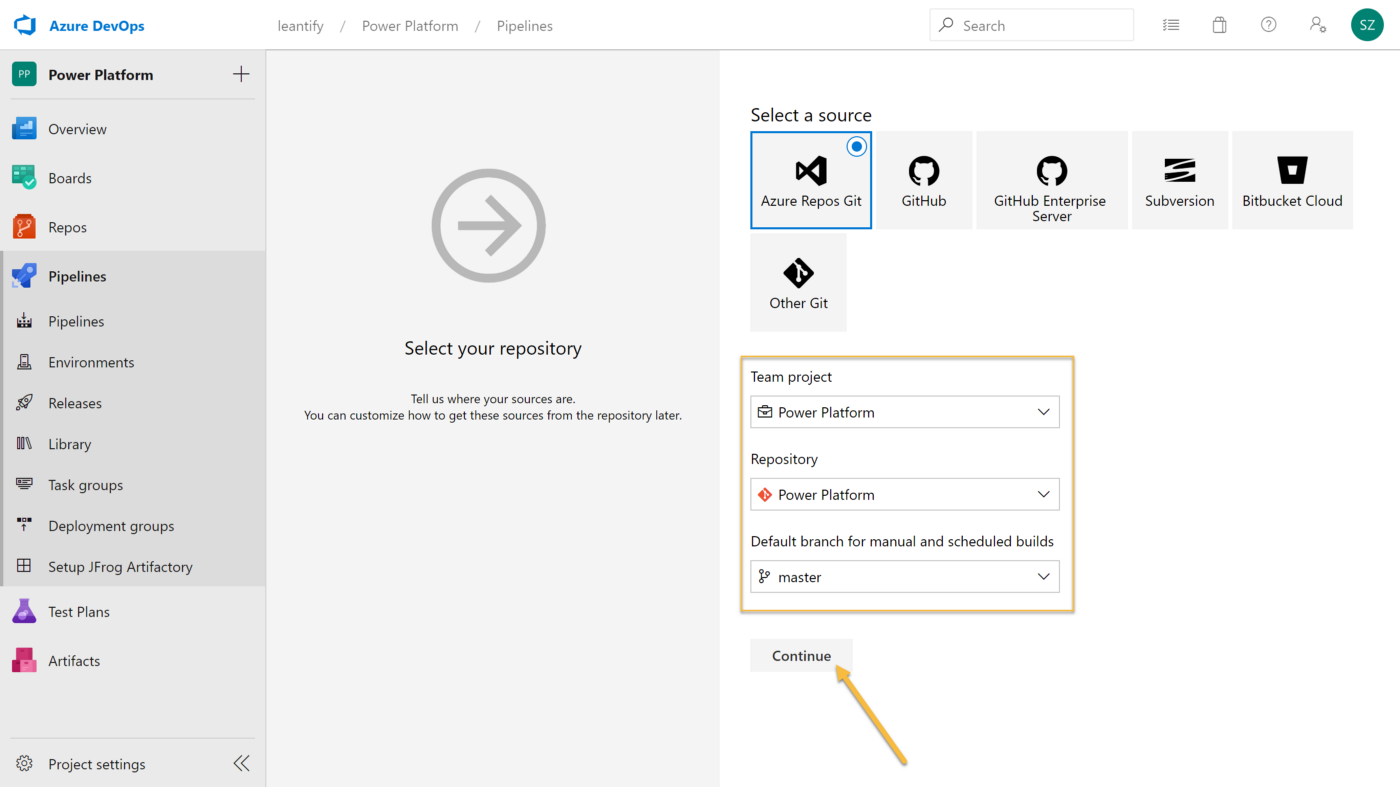
Select your Projects Azure Git Repo as the source and click Continue.
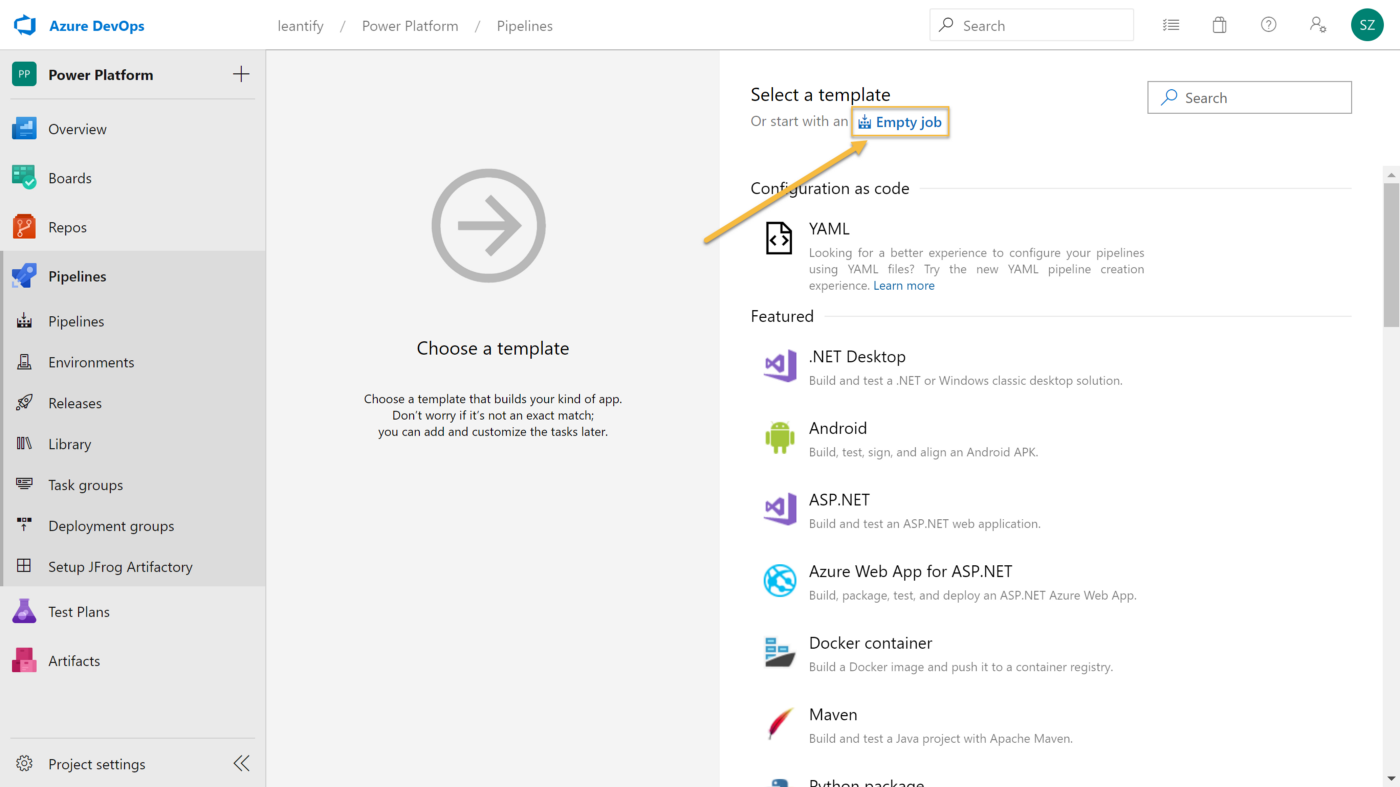
Click the Empty job template, and we’re done creating an empty pipeline.
Adding the Power Apps Build Steps
In the next few steps, we’re using an Azure DevOps extension from the Visual Studio Marketplace to communicate and interact with our Power Platform.
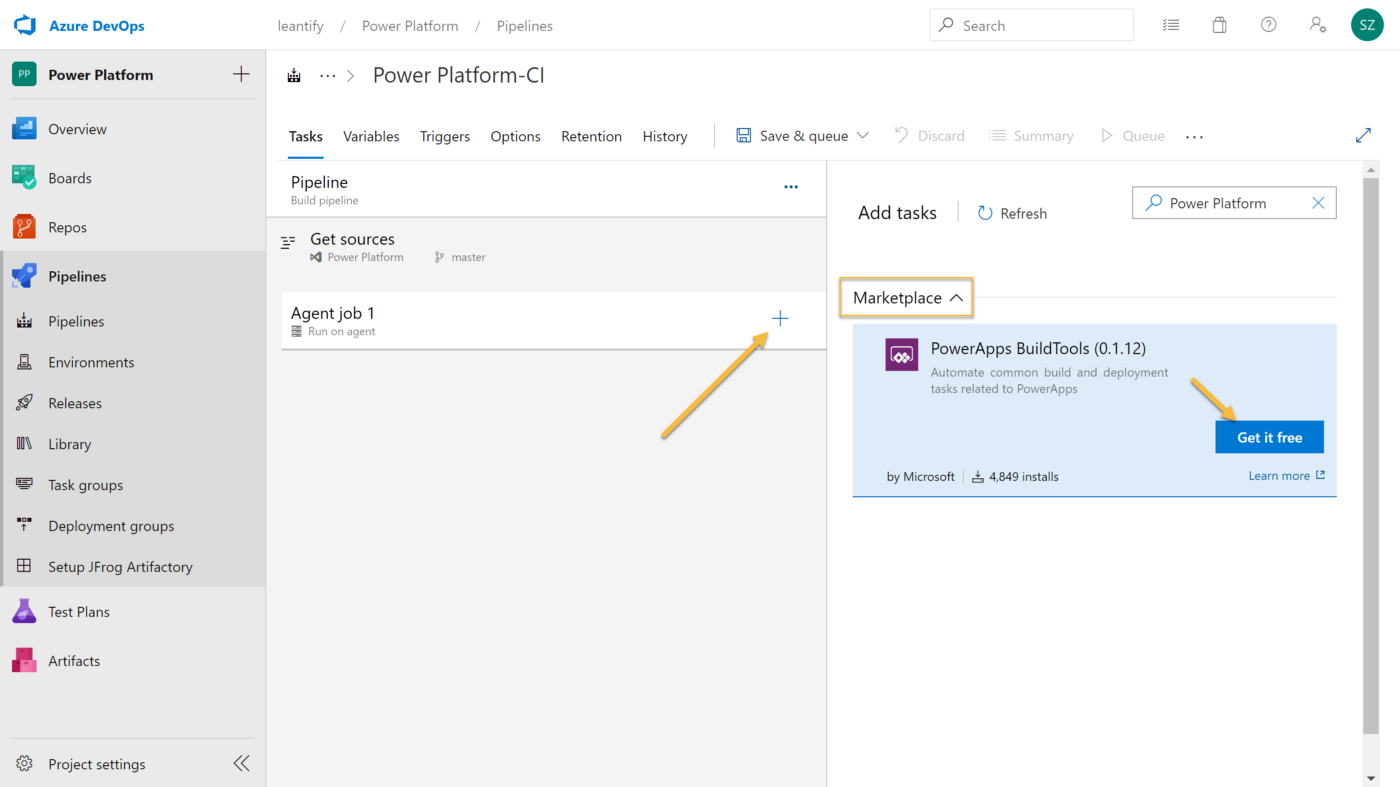
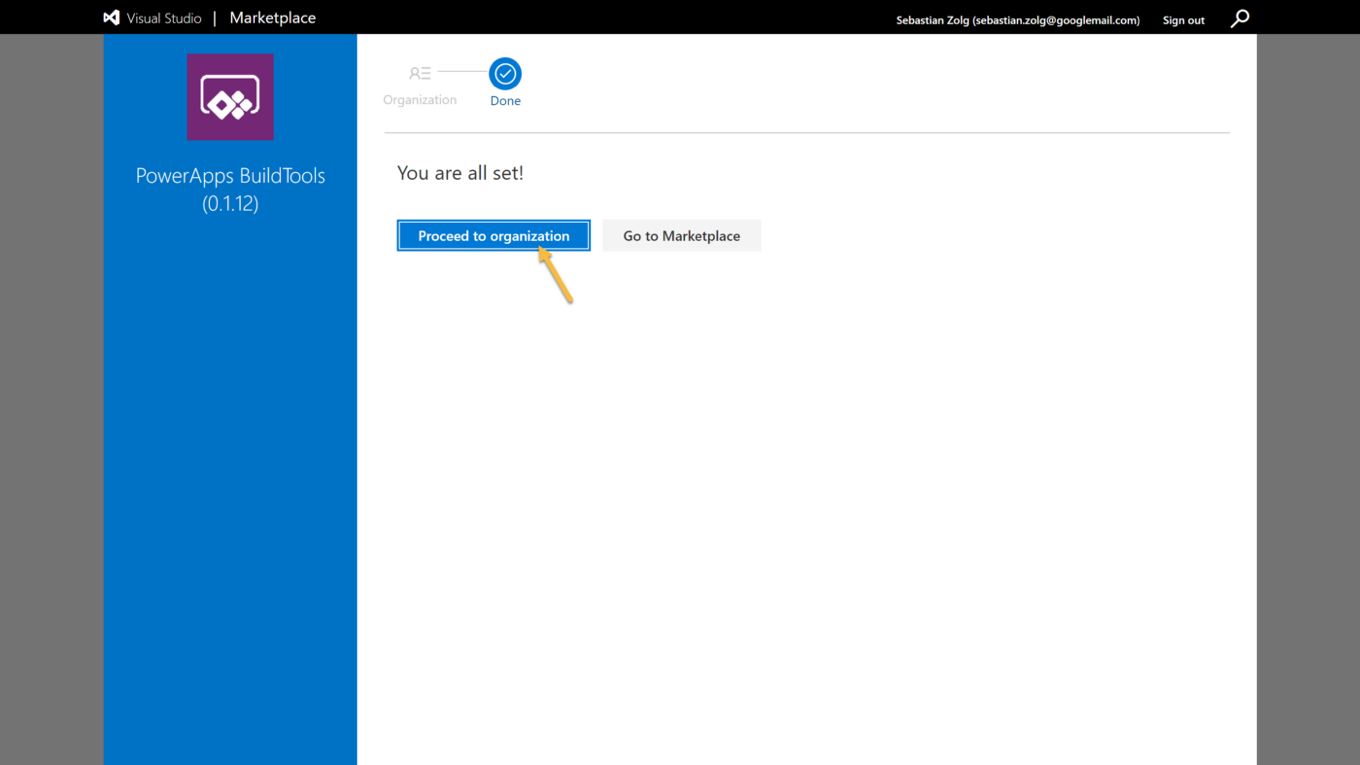
Inside the empty pipeline, click the + icon and search for Power Platform. From the Marketplace results, select the PowerApps BuildTools and click Get it free.
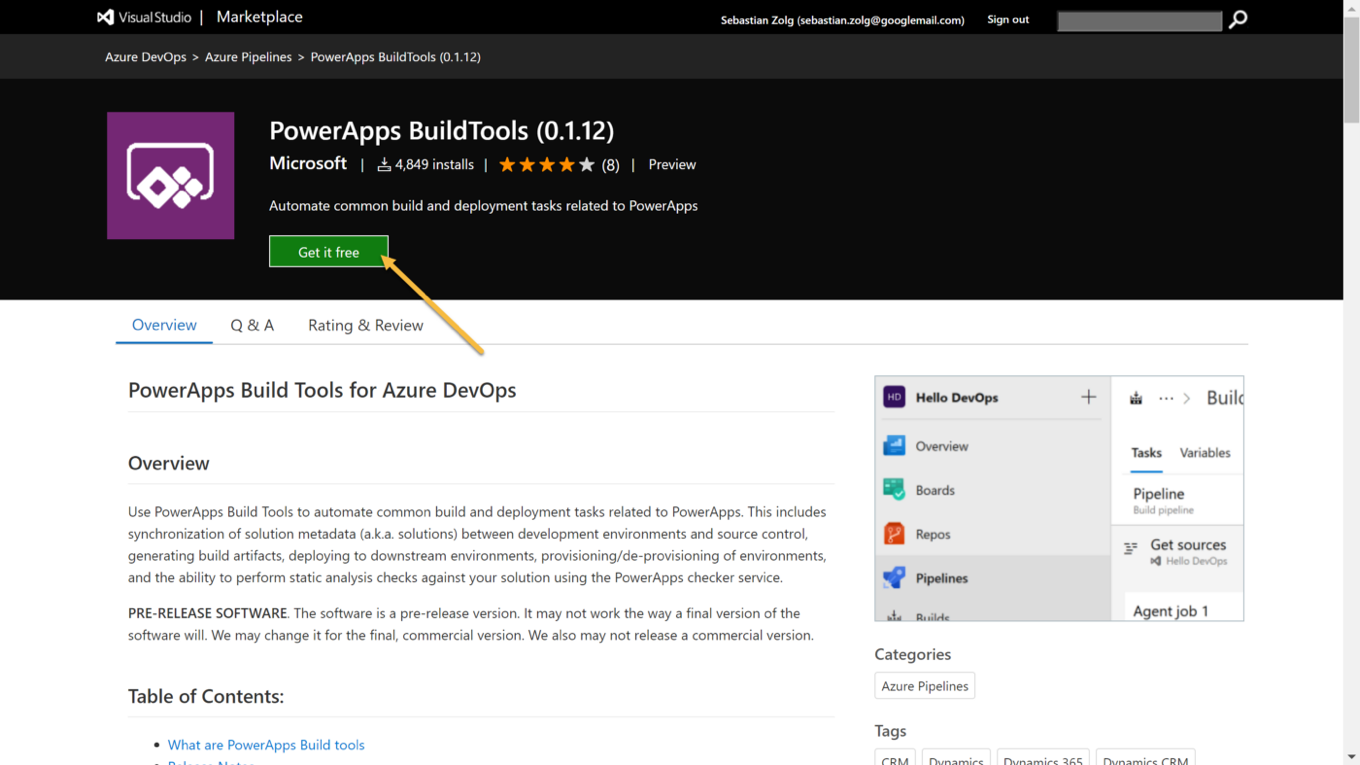
You’ll be redirected to the Visual Studio Marketplace. Click to get it free and install it for your Azure DevOps organization.
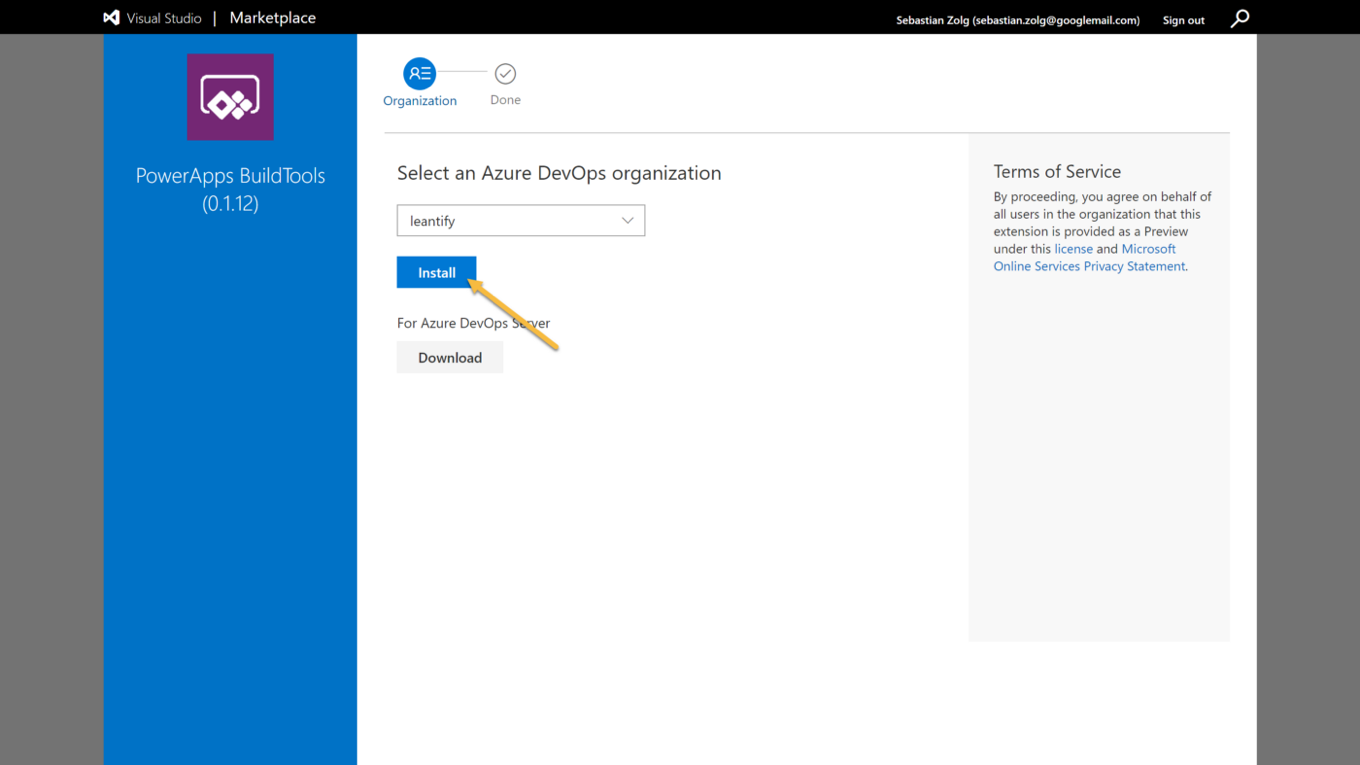
That’s all. Now we can work with a bunch of new tasks that are shipped through this extension.
Export and Check-in the Solution
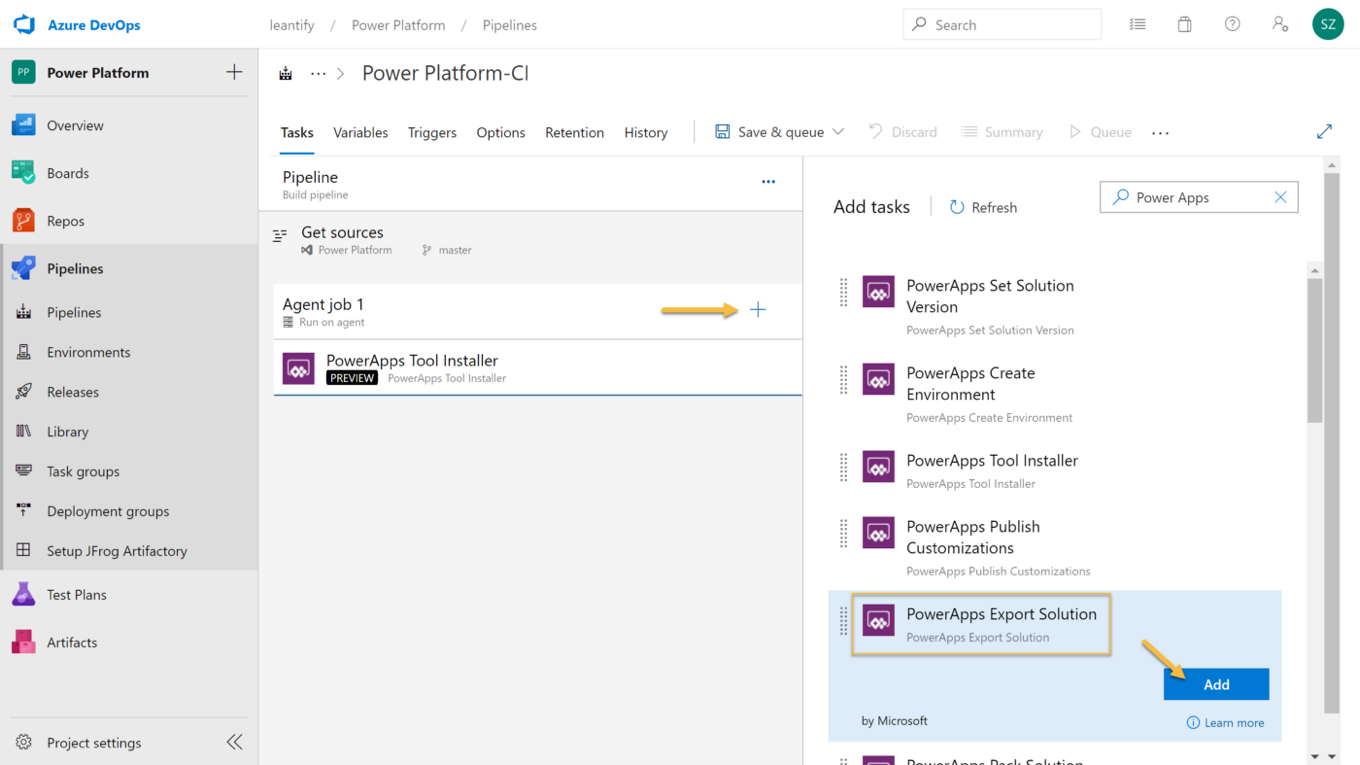
Back in our empty pipeline, click the + icon and search for the PowerApps Tool installer. This must be the first step of every pipeline, as it downloads the necessary resources at runtime. This step doesn’t need any configuration.
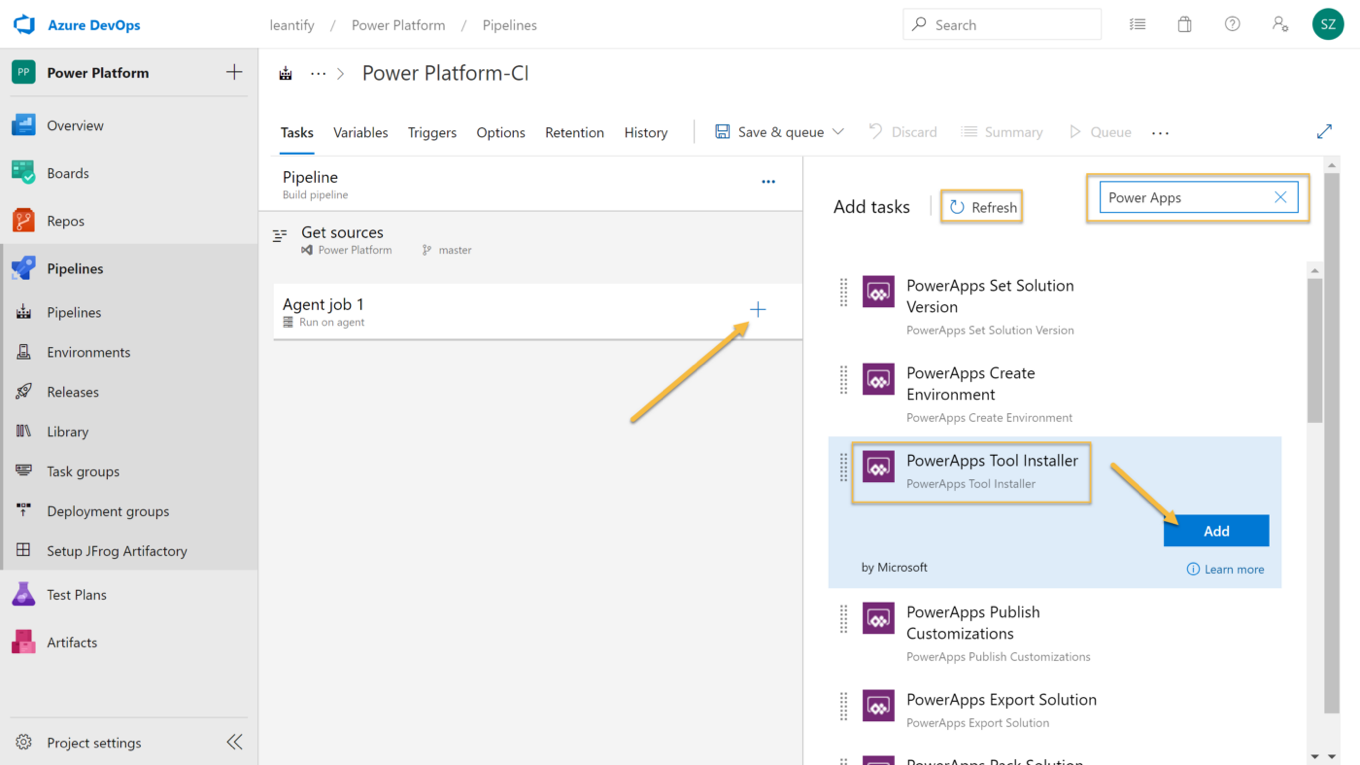
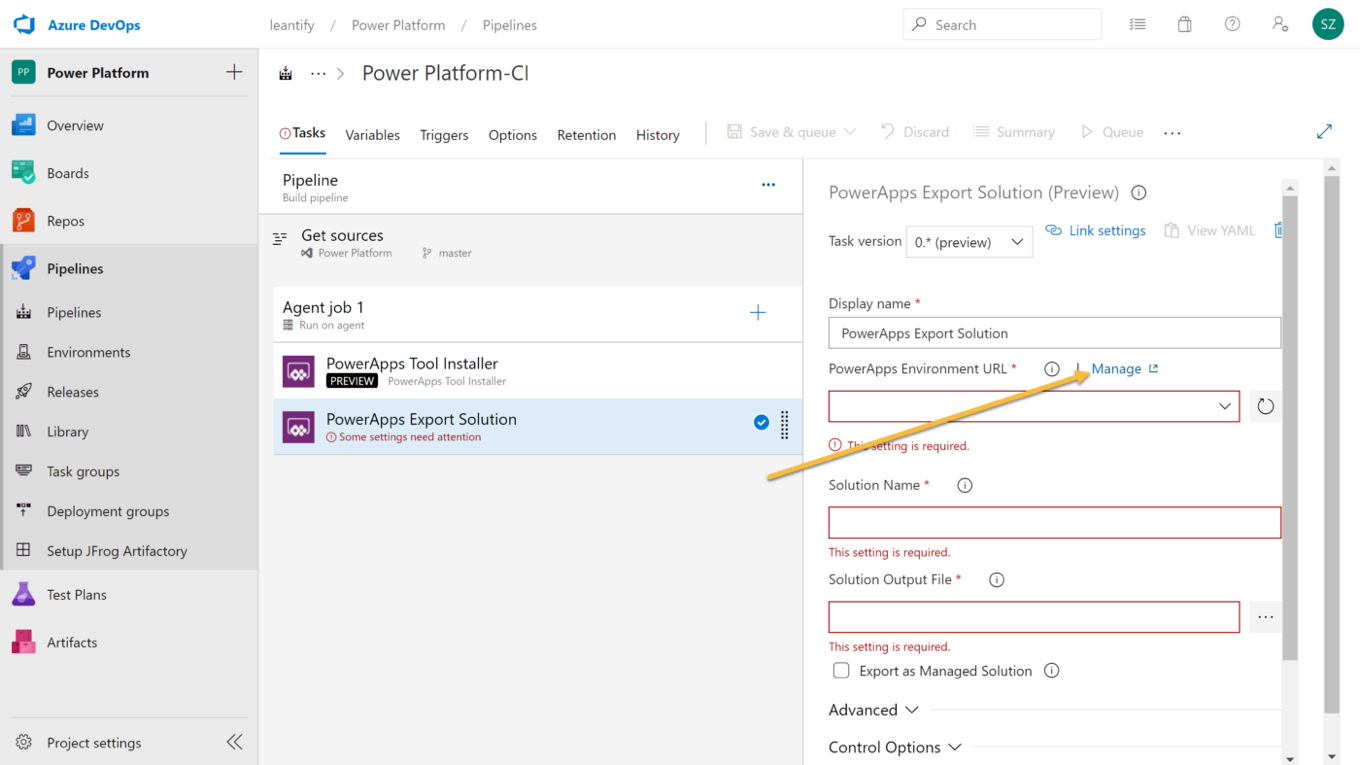
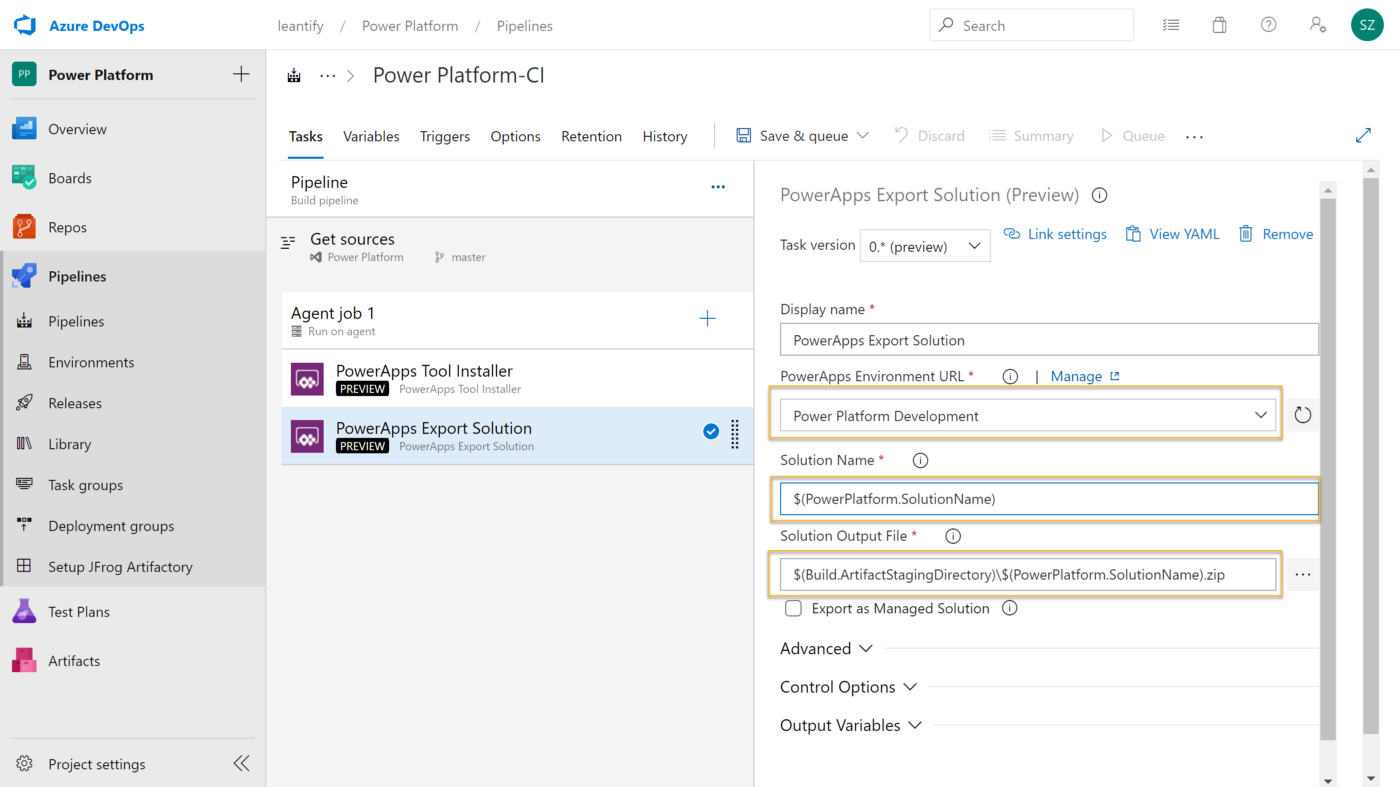
As the second step, we add the PowerApps Export Solution, which exports the solution from our source Power Platform environment.
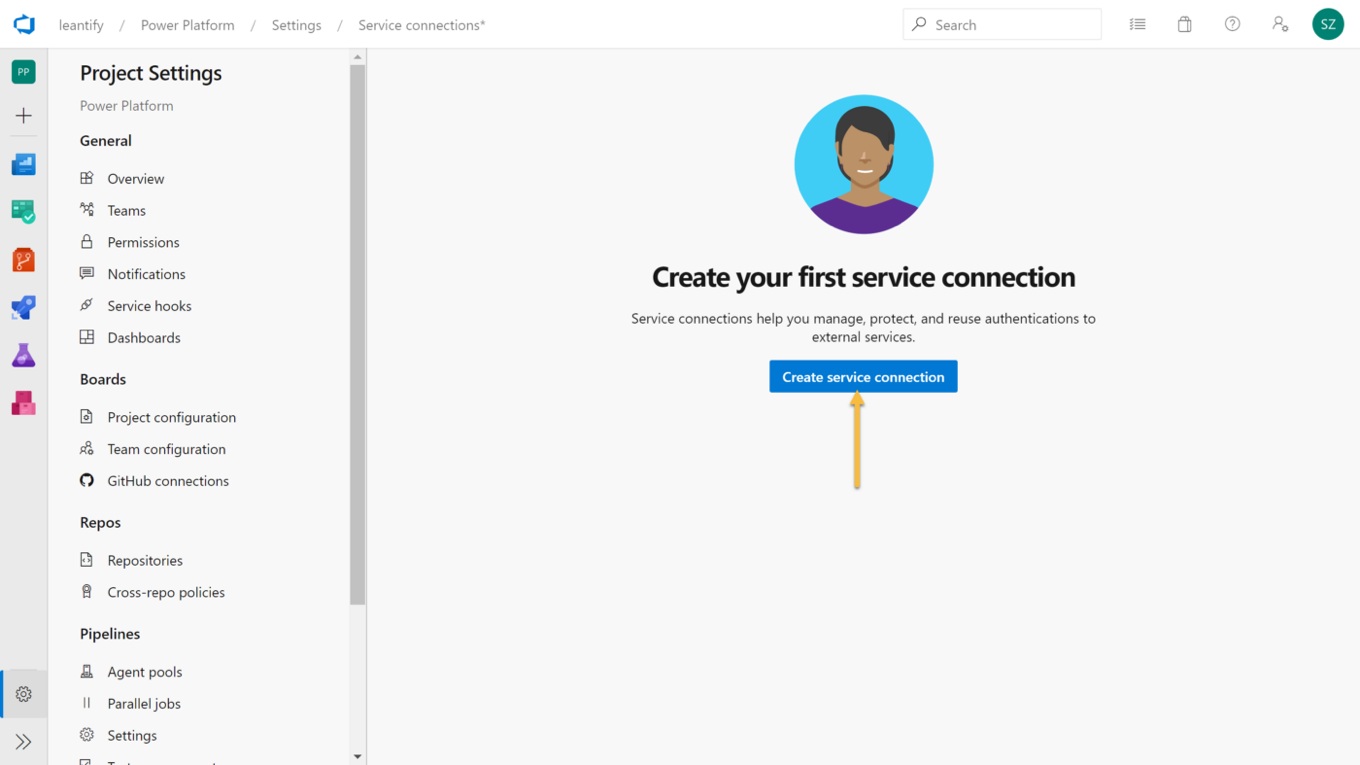
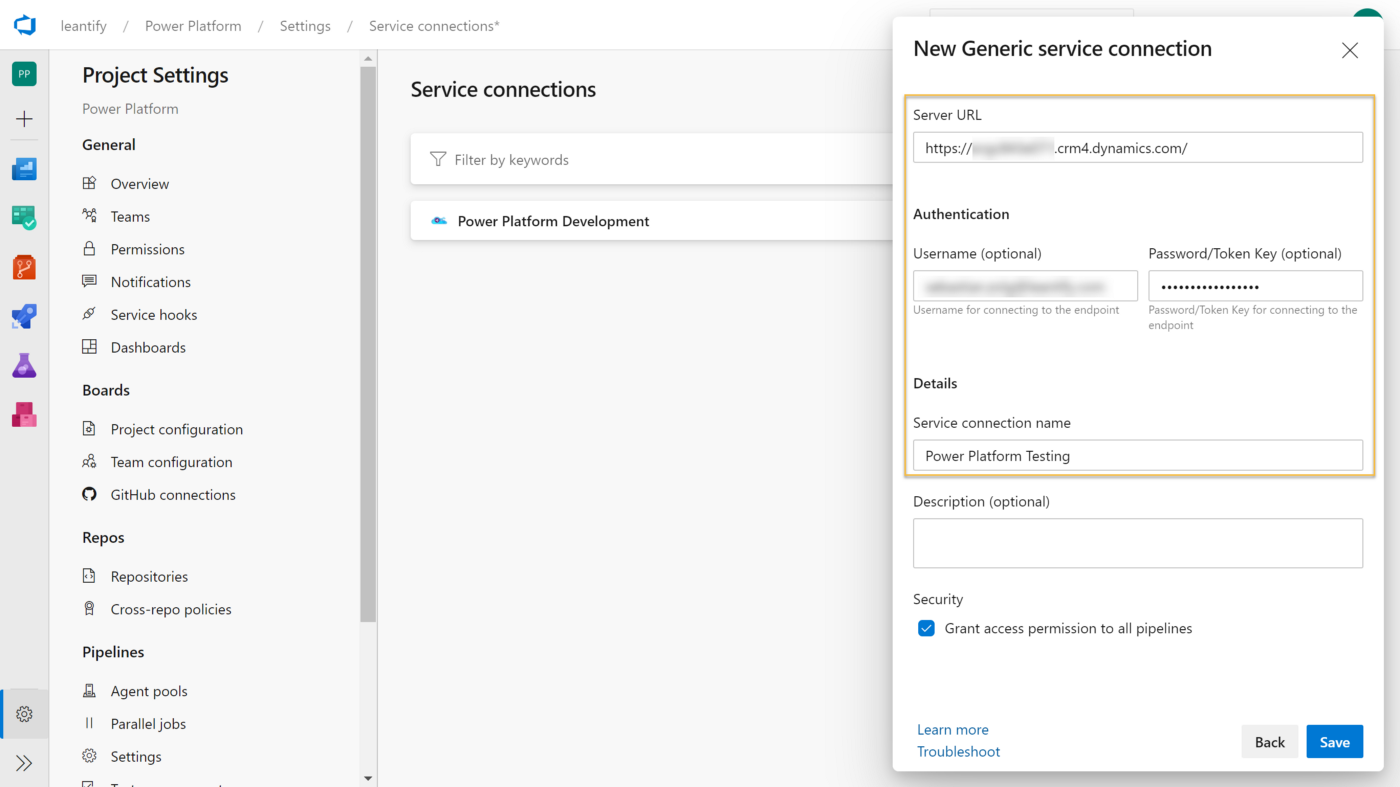
This step needs a couple of parameters to work well. First, we create a service connection to our Power Platform environment.To do this, click the Manage link next to the PowerApps Environment URL.
Click Create service connection and choose Generic as the connection type.
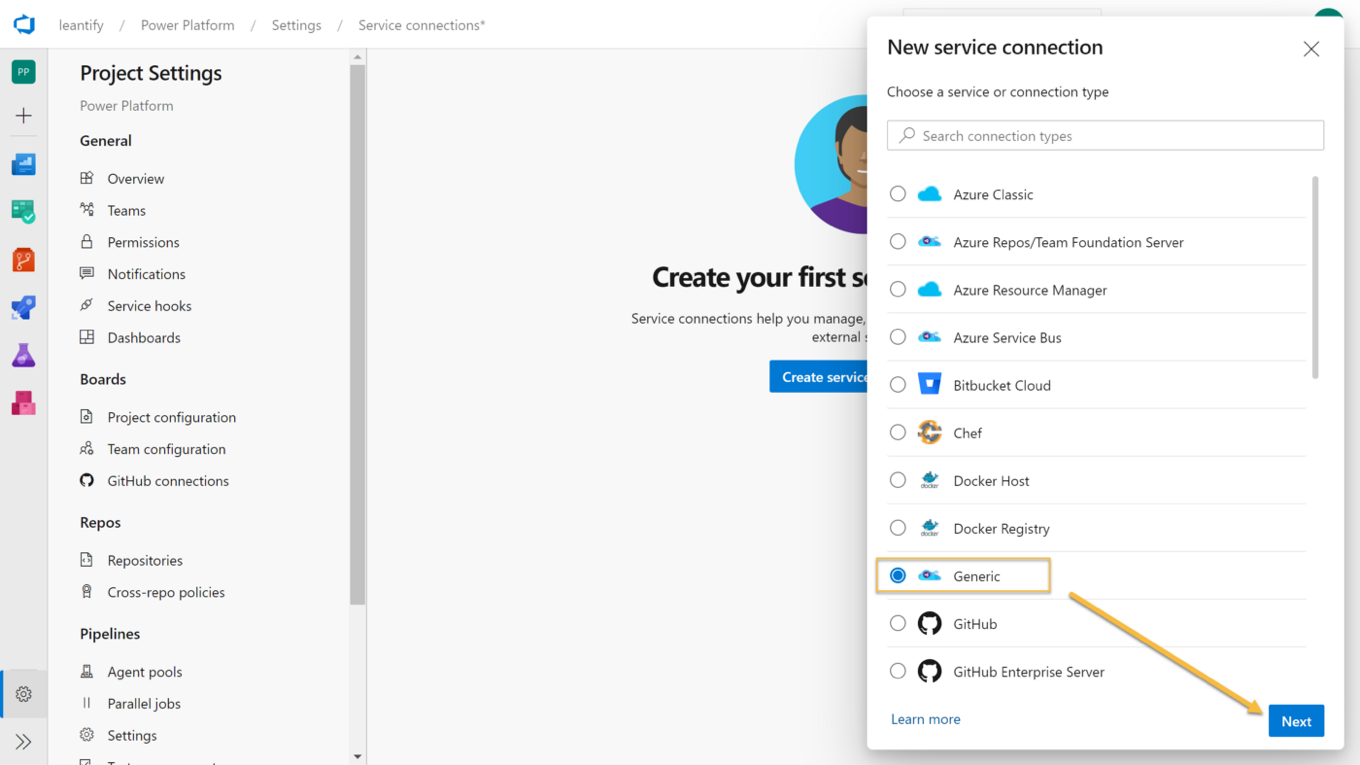
Enter the Server URL of your Power Platform environment. You can find it on the environment details within the admin portal.
Enter the mail address and password of any user who has full access to that environment. Name the connection something like Power Platform Development.
Click Save to finish.

Note: There will soon come a more secure and modern way to connect to your environment using service principles. There is already a GitHub issue you could subscribe to get informed when it is available.
Back in your pipeline, choose the newly created connection from the drop-down. Next, we have to configure a few build variables for this step, which will be resolved automatically during runtime.
| Variable | Value |
|---|---|
| Solution Name | $(PowerPlatform.SolutionName) |
| Solution Output File | $(Build.ArtifactStagingDirectory)\$(PowerPlatform.SolutionName).zip |
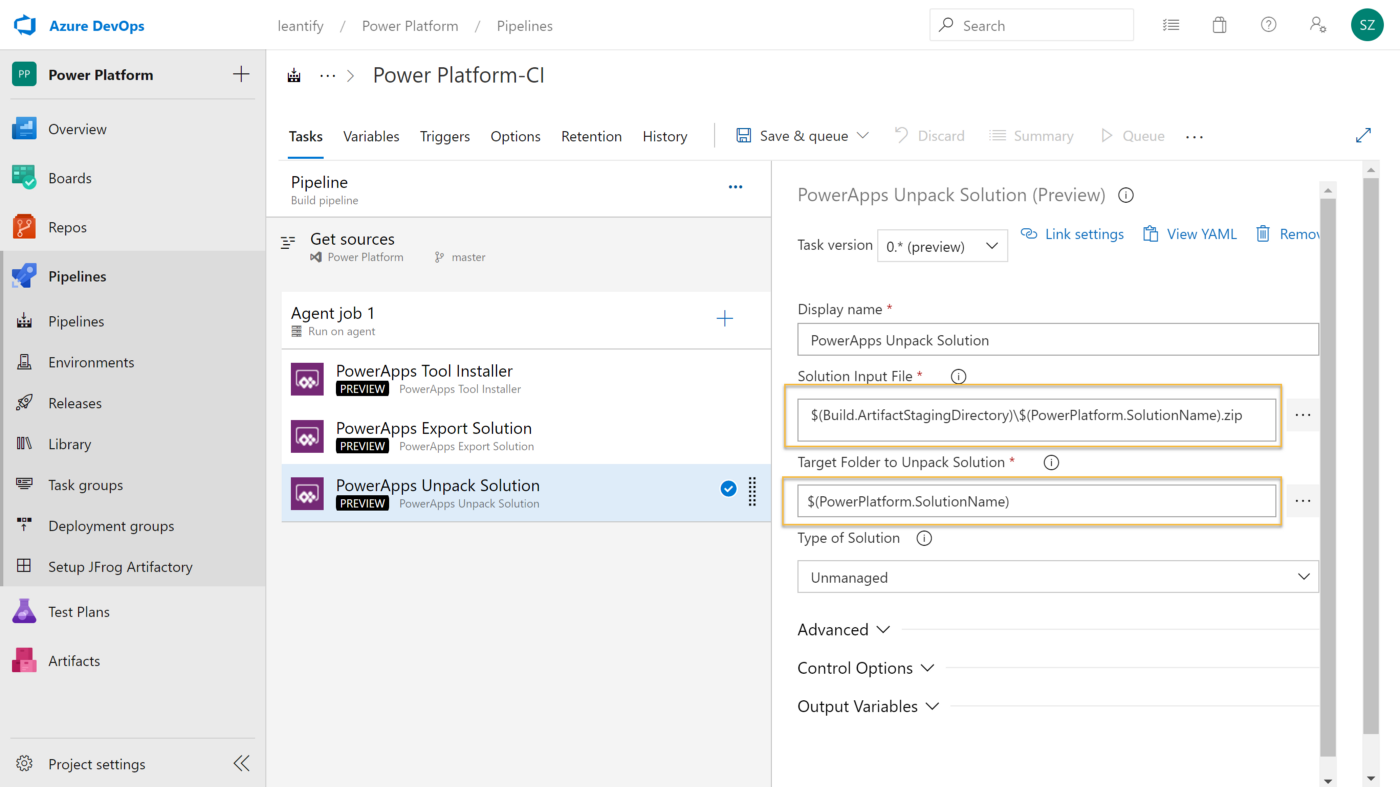
Now we add a third build step using the + icon again. Search for PowerApps Unpack Solution and add it to the pipeline. This step will unpack the Solution zip file to get it’s raw .json or .xml files. This way, we can track all changes using git.
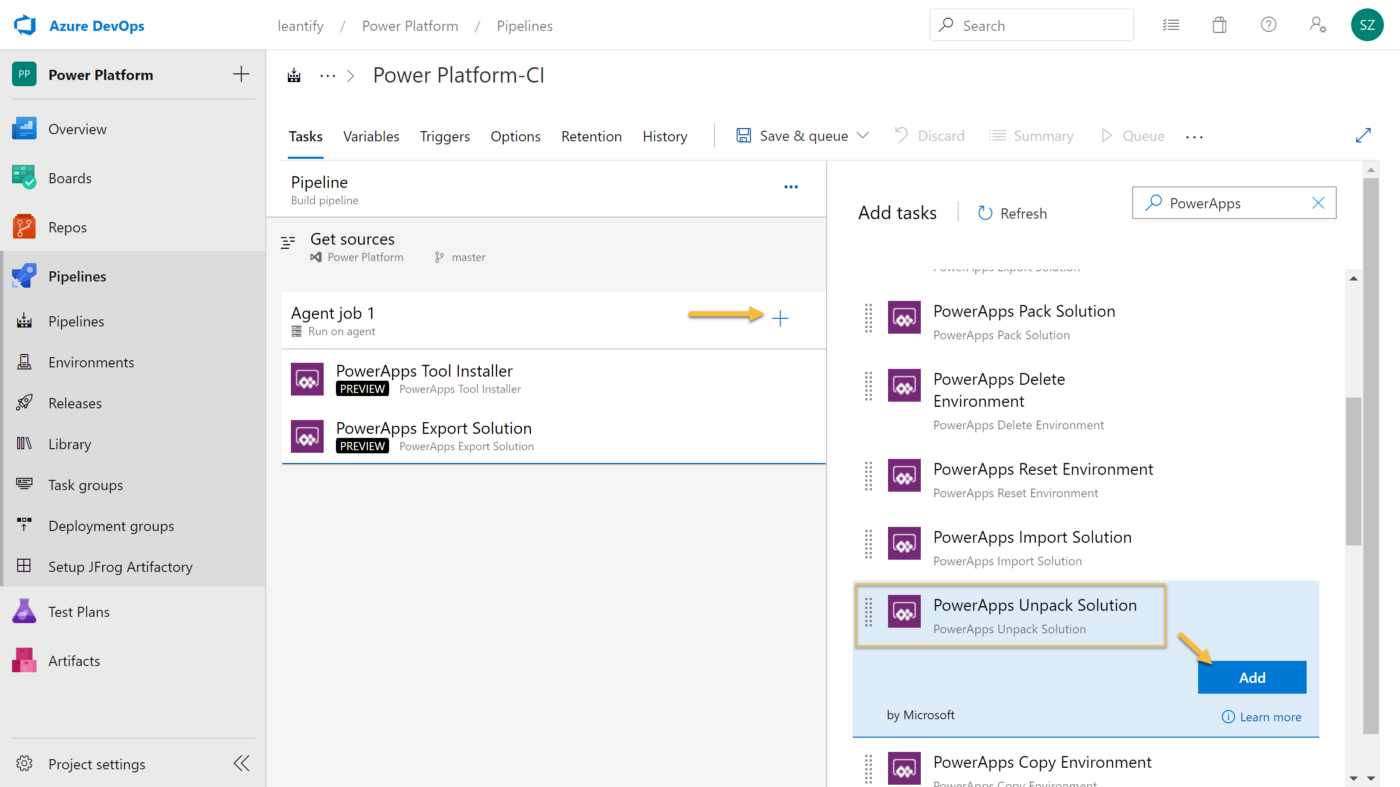
Again, we have to configure a few build variables.
| Variable | Value |
|---|---|
| Solution Input File | $(Build.ArtifactStagingDirectory)\$(PowerPlatform.SolutionName).zip |
| Target Folder to Unpack Solution | $(PowerPlatform.SolutionName) |
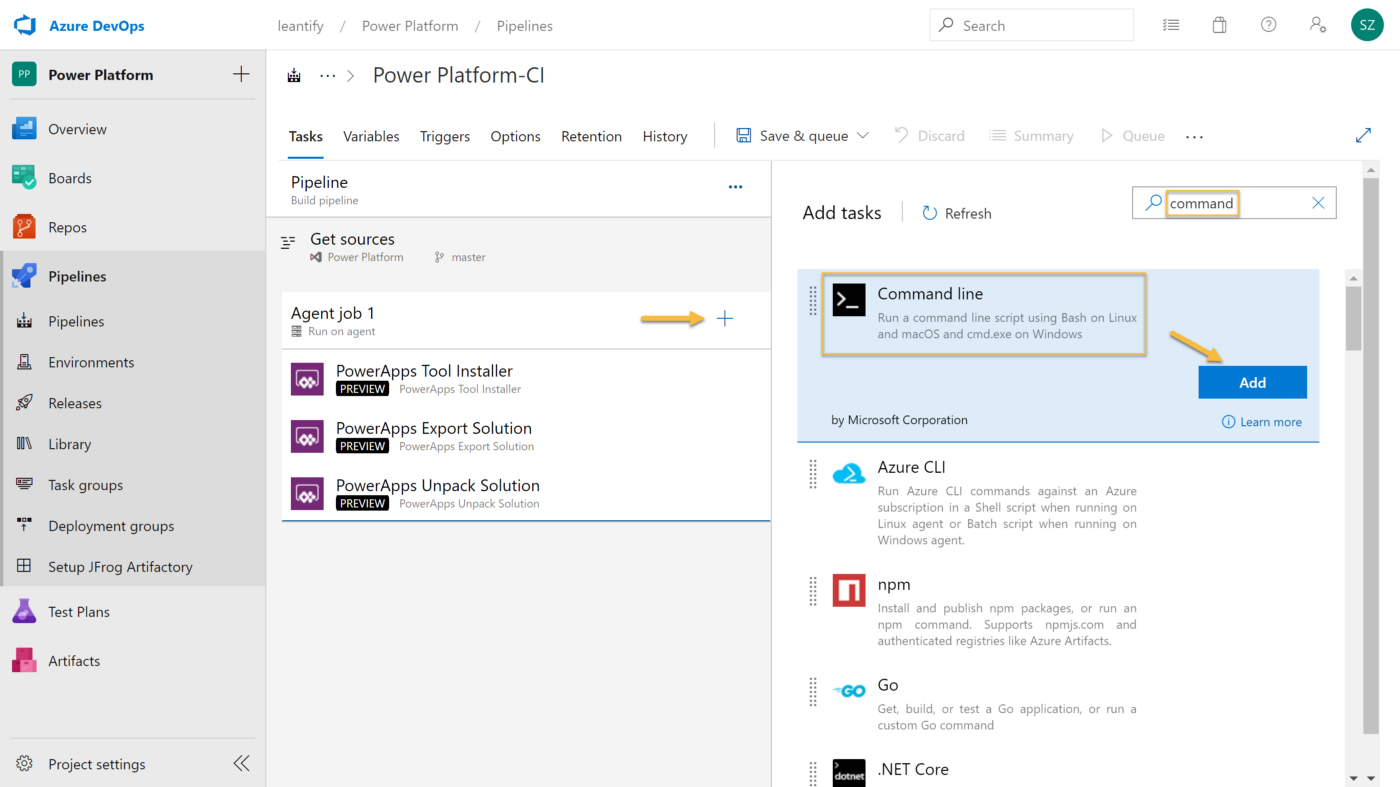
As a final build step, we add a simple Command line task to the pipeline.
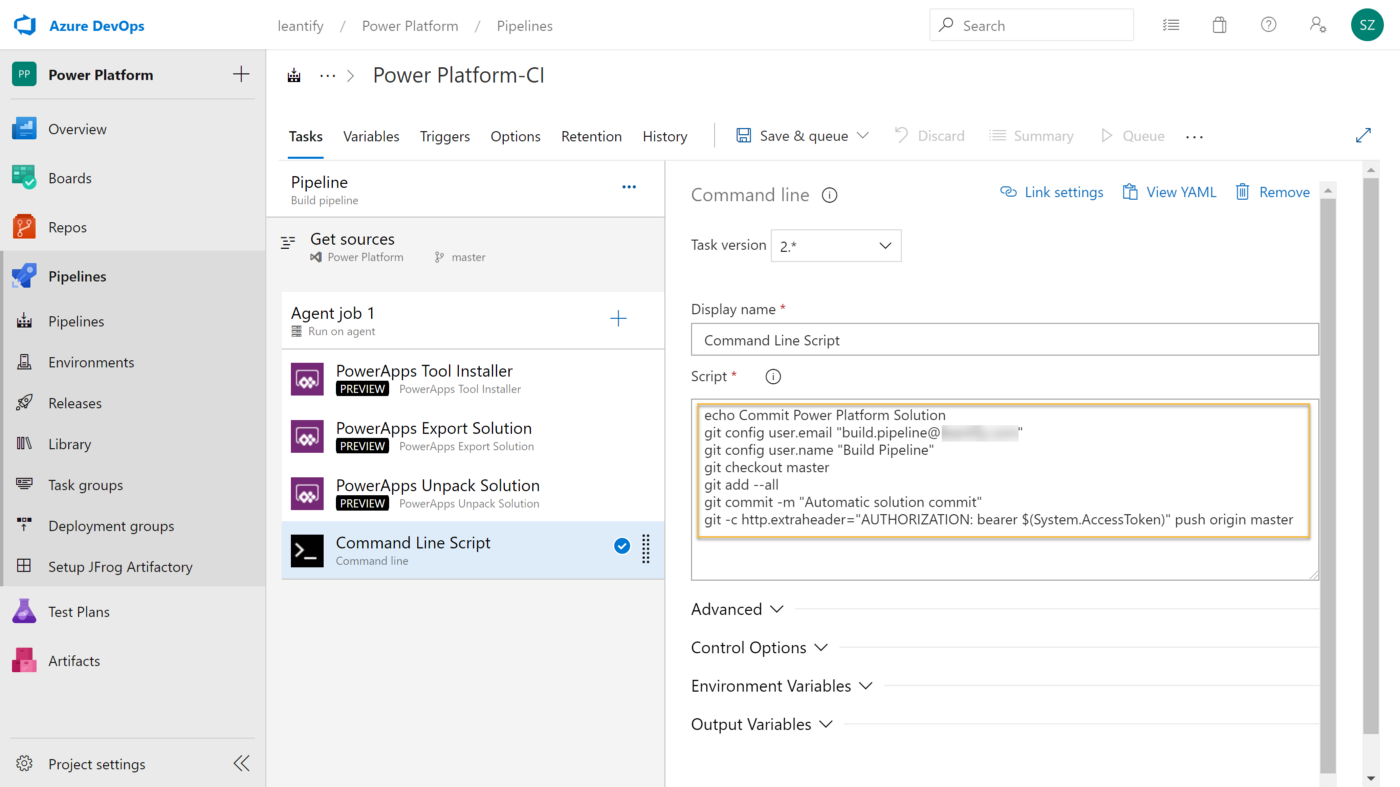
We use this step to store the downloaded and unpacked solution in our git repository. More precisely, we check out the master branch of our repository and commit all changes to it.
echo Commit Power Platform Solution
git config user.email "build.pipeline@xxx.com"
git config user.name "Build Pipeline"
git checkout master
git pull origin
git add --all
git commit -m "Automatic solution commit"
git -c http.extraheader="AUTHORIZATION: bearer $(System.AccessToken)" push origin master
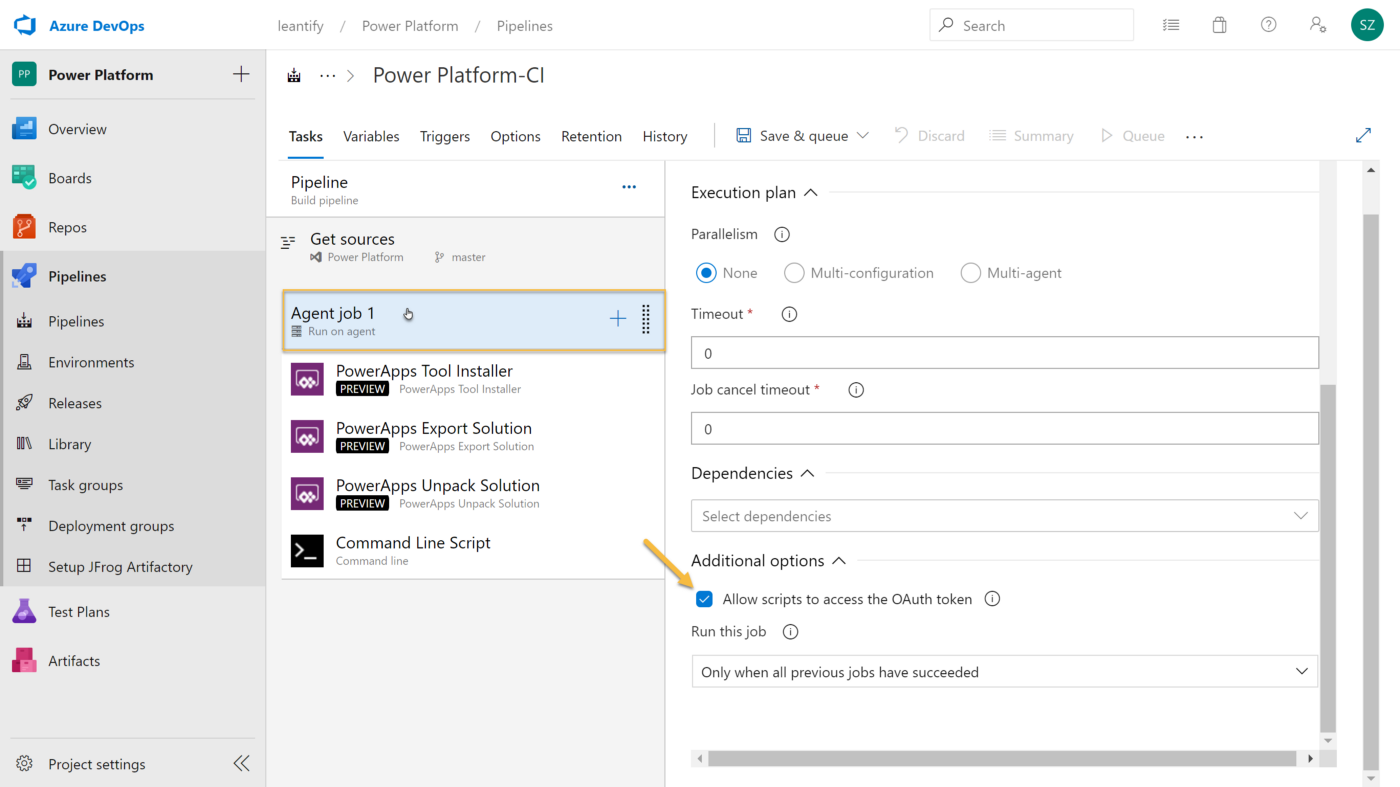
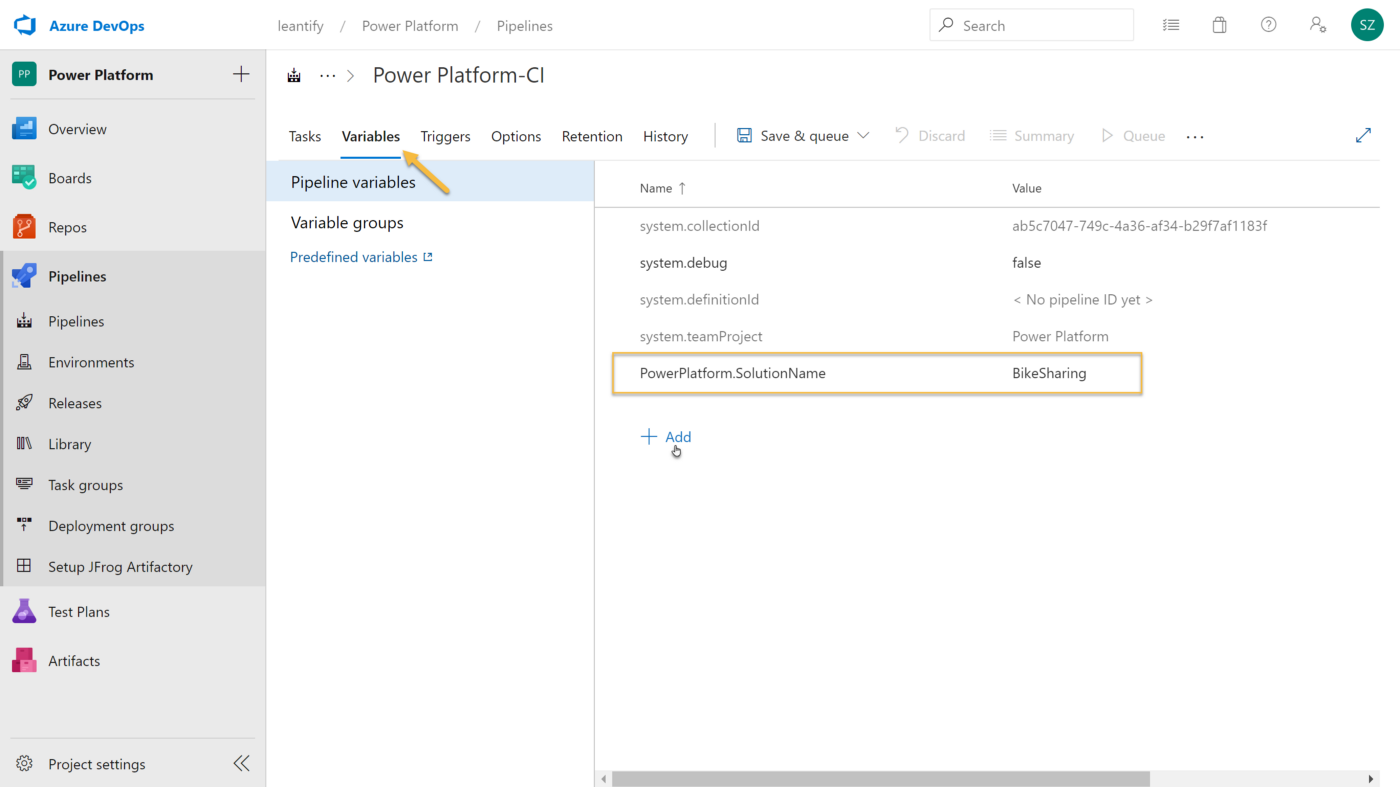
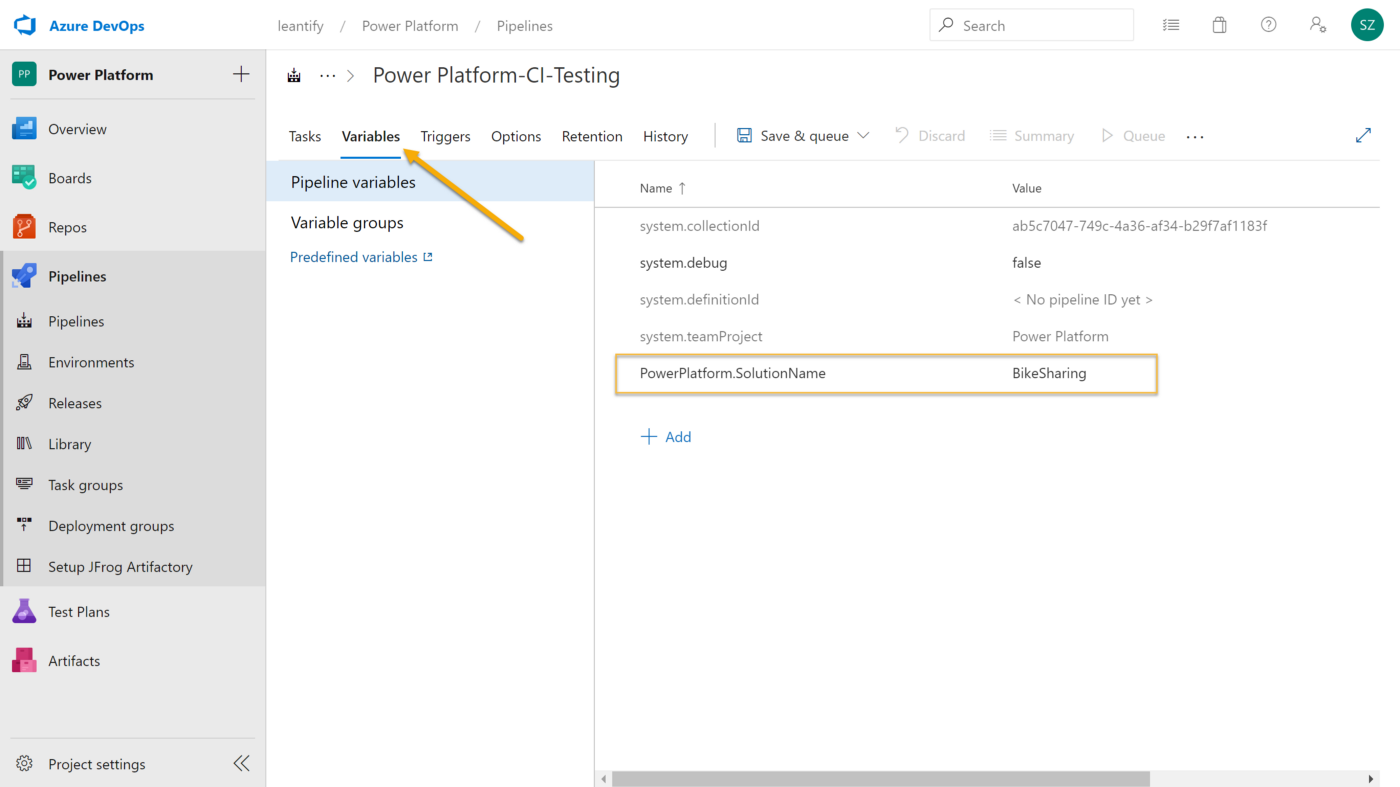
Now that we have all build steps configured, we make a few more changes to the pipeline. First, we Allow scripts to access the OAuth token. We use this token in the previous Command Line Script.
Next, we create the PowerPlatform.SolutionName variable, which we use inside the build steps. We set this variable to the name of our solution within the Power Platform, e.g. BikeSharing.
Now click Save, but don’t queue it.

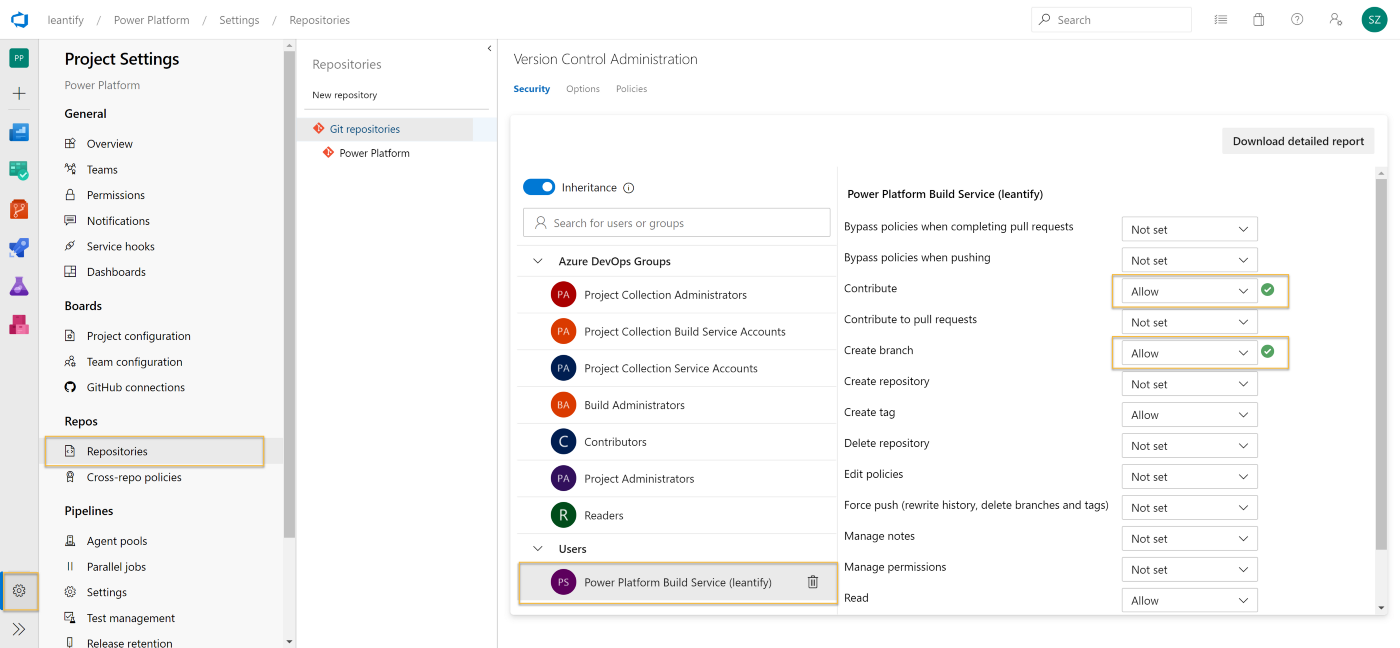
As a final step, we have to allow the pipeline to make modifications to the git repository. We do this with the Project Settings on the bottom left. Click Repositories and find your Build Service user from the list. Allow both to Contribute and Create a branch.
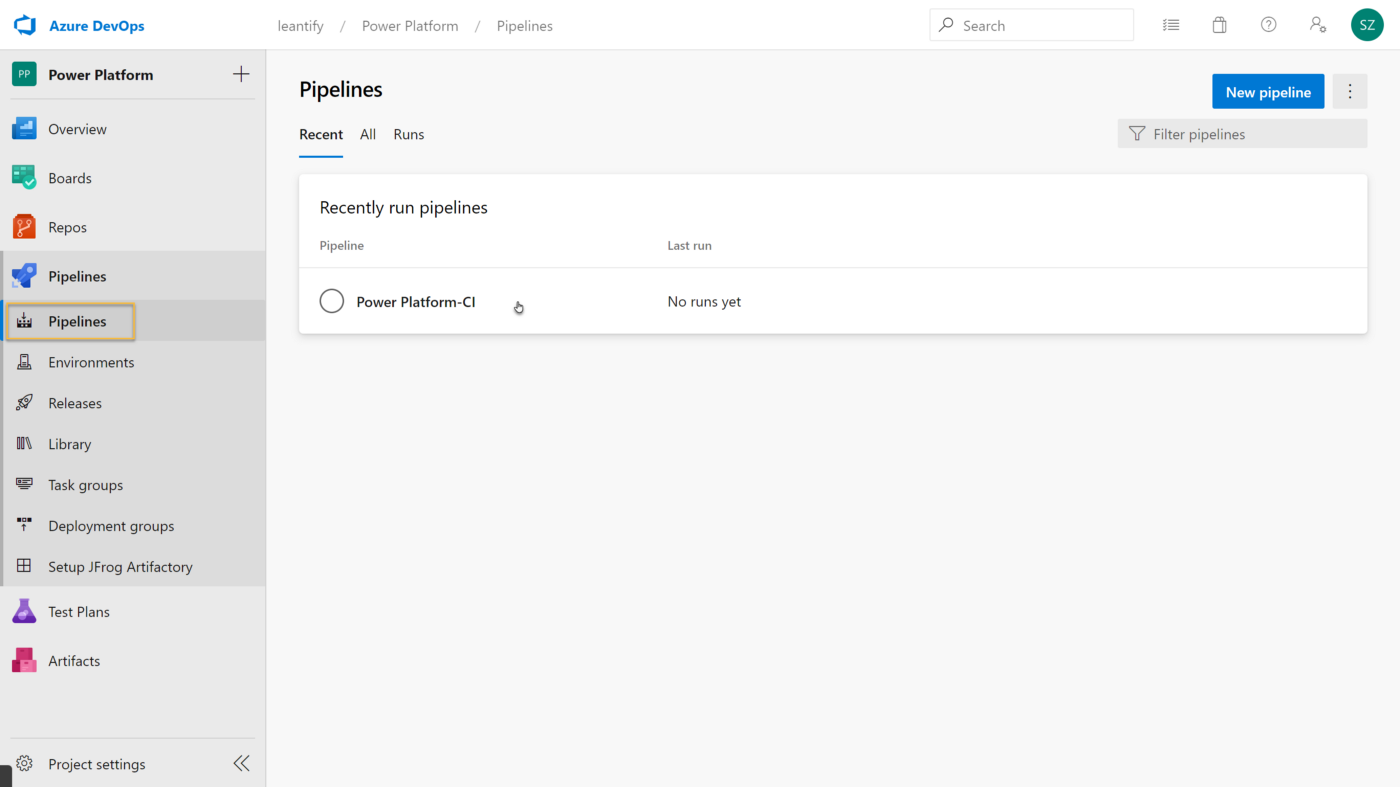
Running the Pipeline for the first time
With our solution in place, and our Pipeline ready, we can now run it for the first time. This will download the solution and put it under source control. Go to Pipelines and select the previously created pipeline.
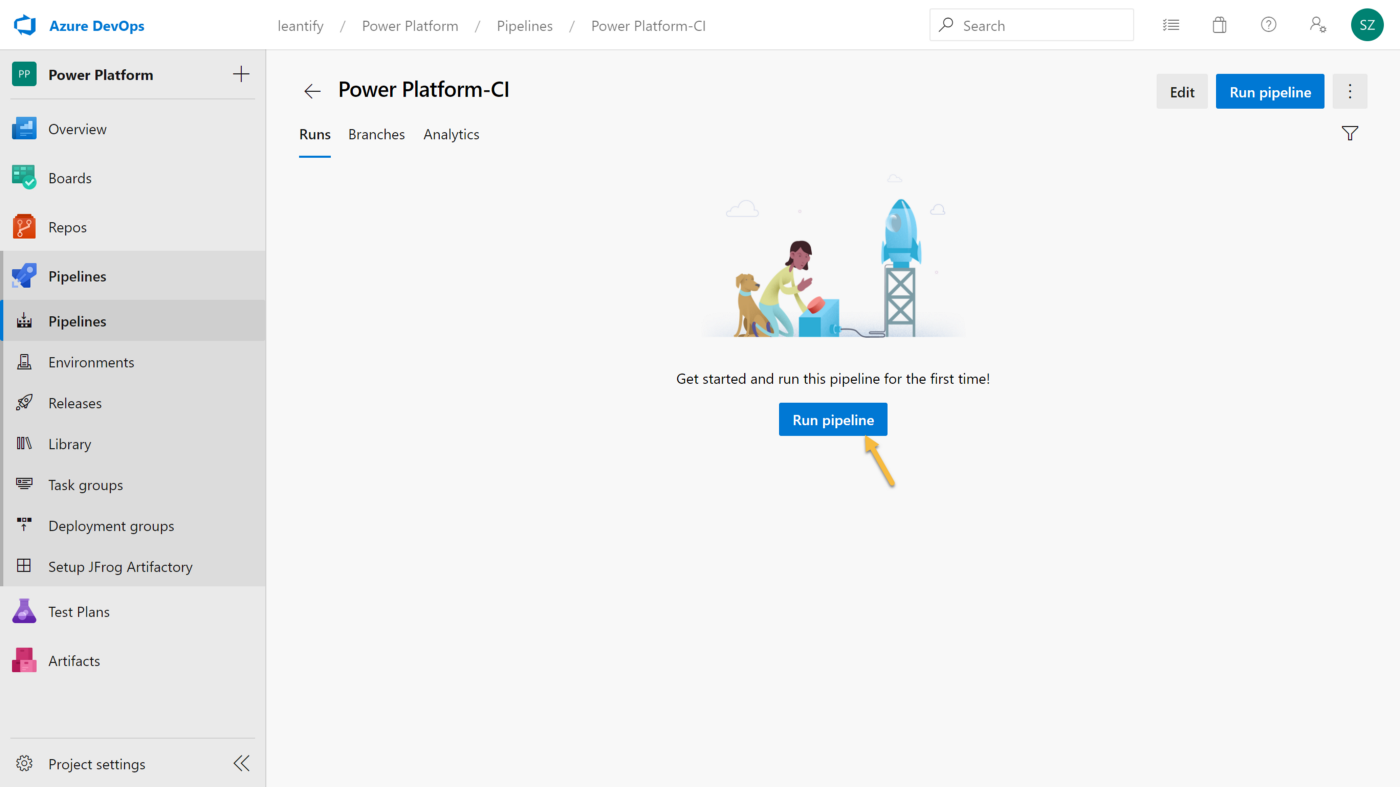
Click the Run pipeline button and review the settings.


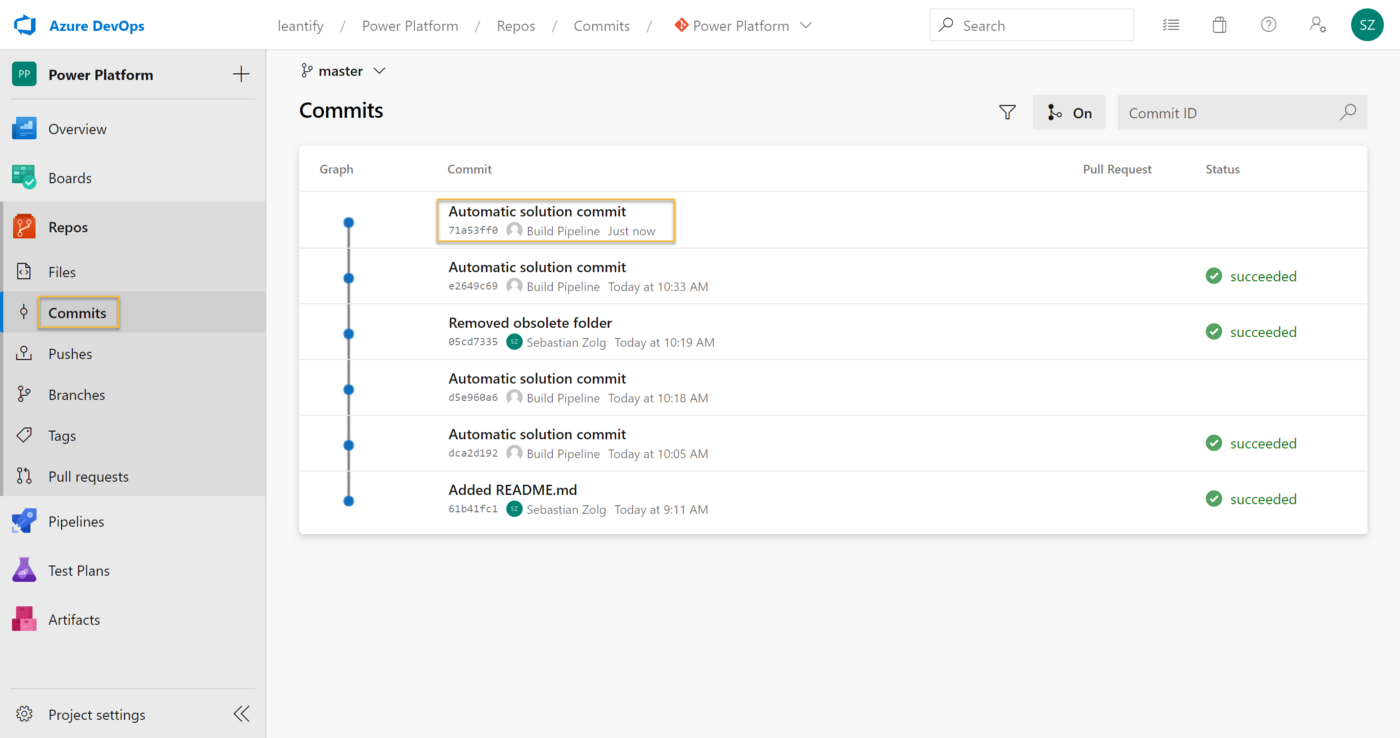
After a successful run, we can see the unpacked solution in our git repository.
Build a Continuous Delivery Pipeline
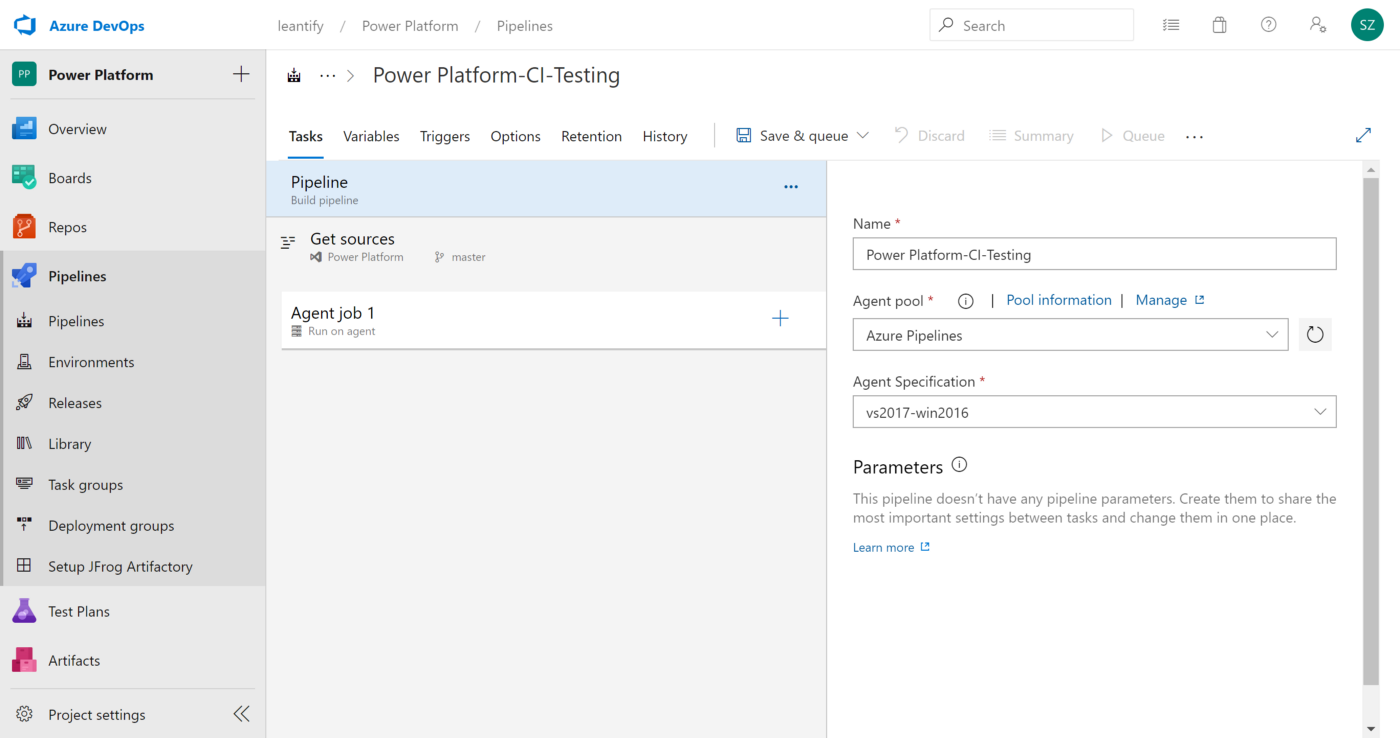
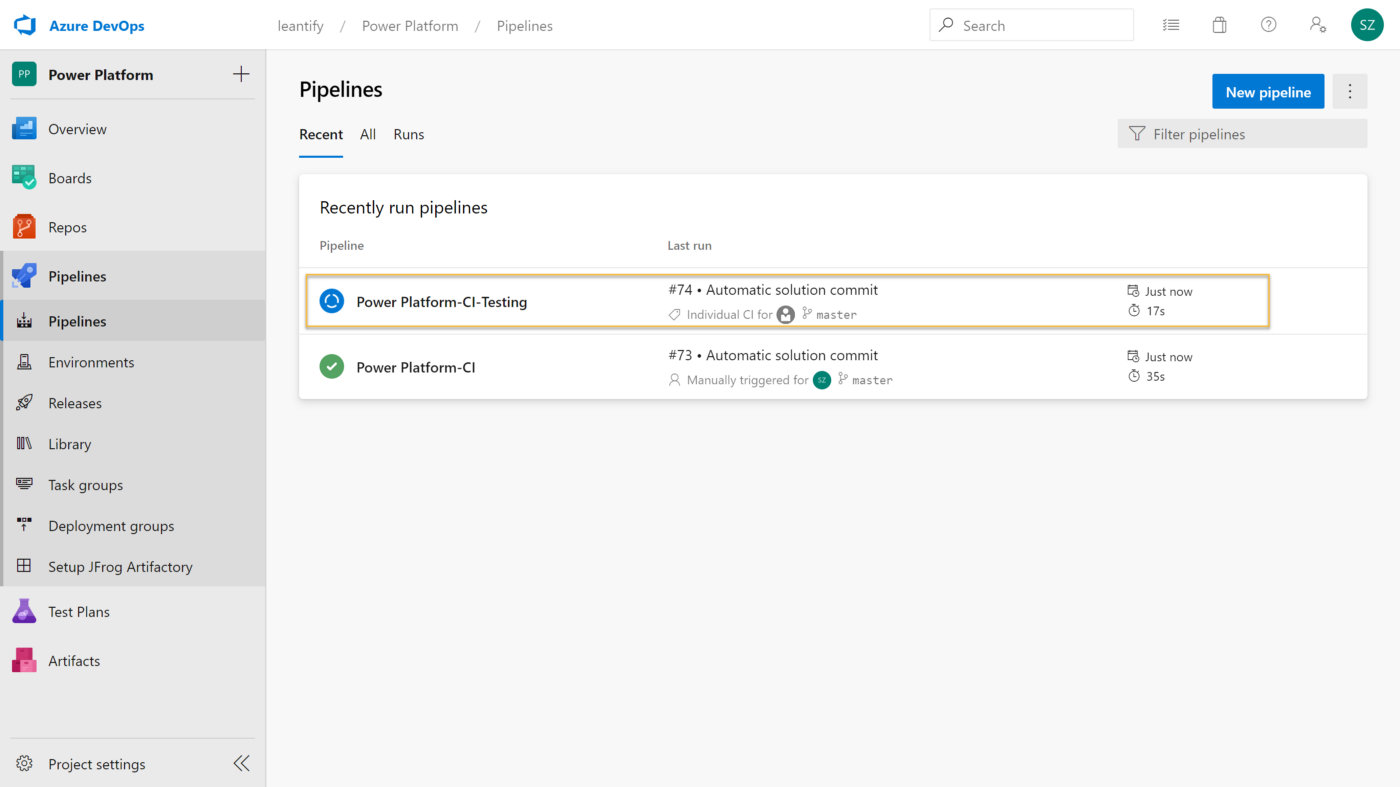
Now that we have everything under source control, we can start rolling out the solution to other test-, staging- or production environments. To do this, we create a second pipeline just like before. Name it something like Power Platform-CI-Testing or anything else that reflects your purpose.
Again, add the PowerApps Tool Installer as the first step. As the second step, add PowerApps Pack Solution and configure its parameters as follows:
| Variable | Value |
|---|---|
| Source Folder of Solution to Pack | $(PowerPlatform.SolutionName) |
| Solution Output File | $(Build.ArtifactStagingDirectory)\$(PowerPlatform.SolutionName).zip |
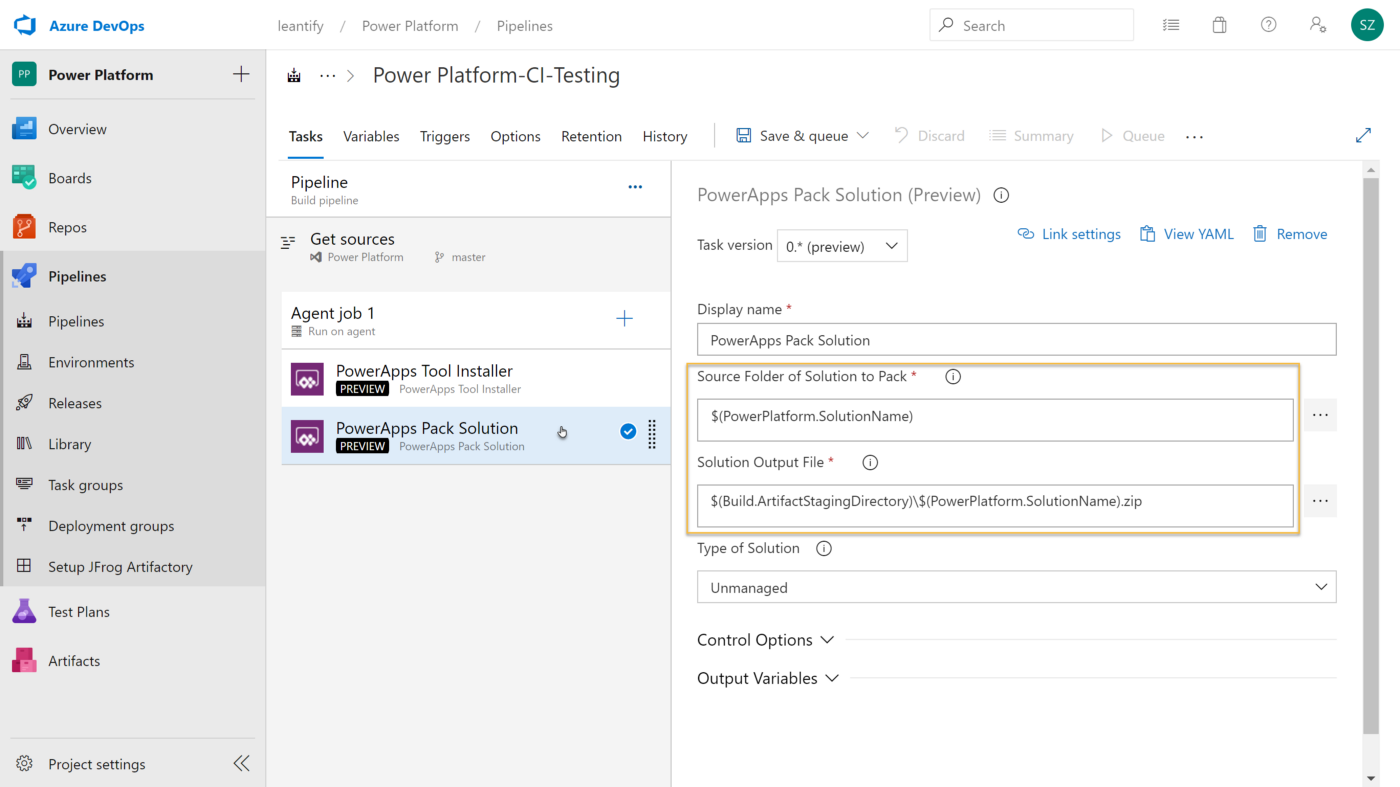
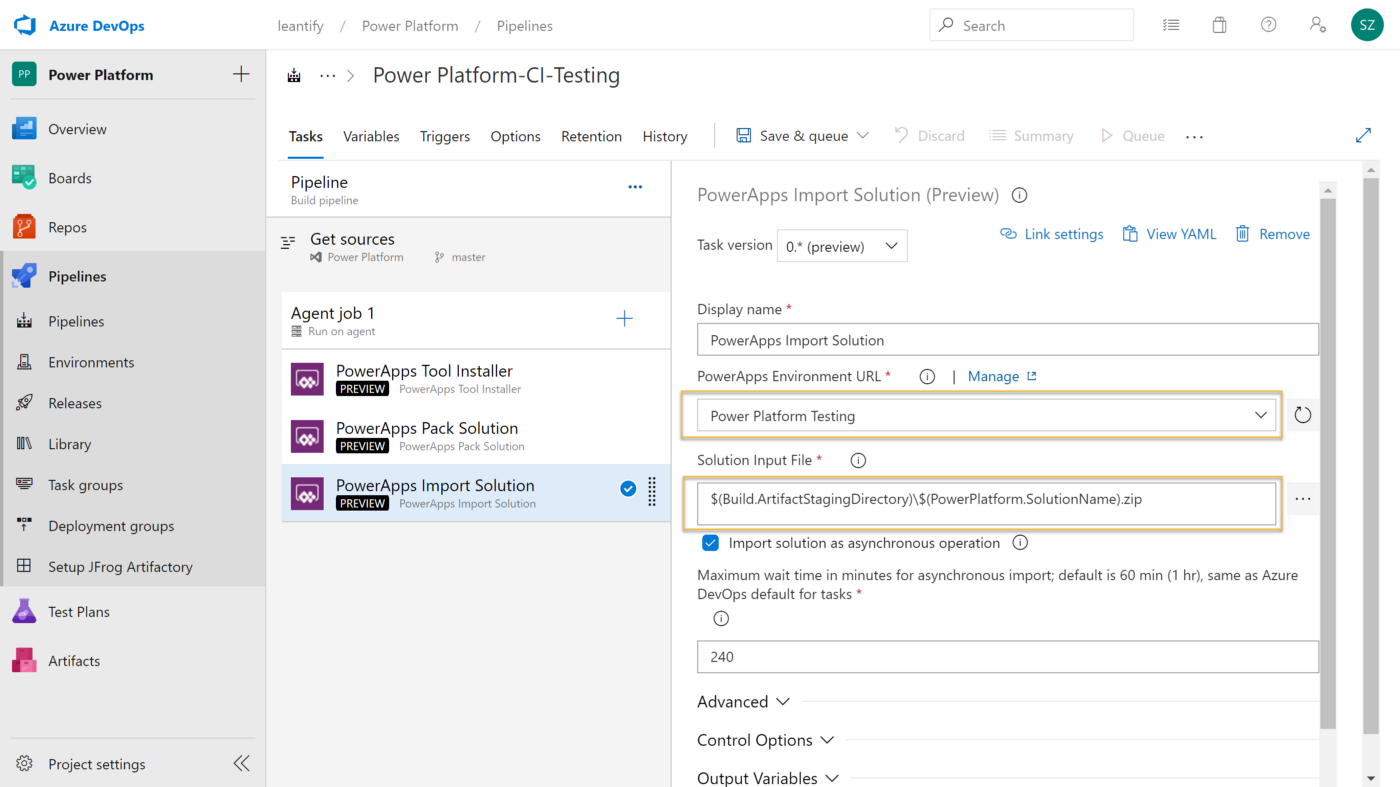
This step simply packs the solution as a zip file so that it can be imported into the target environment. As the third step, we add the PowerApps Import Solution. To make this step work and connect to your target environment, we create another generic service connection.
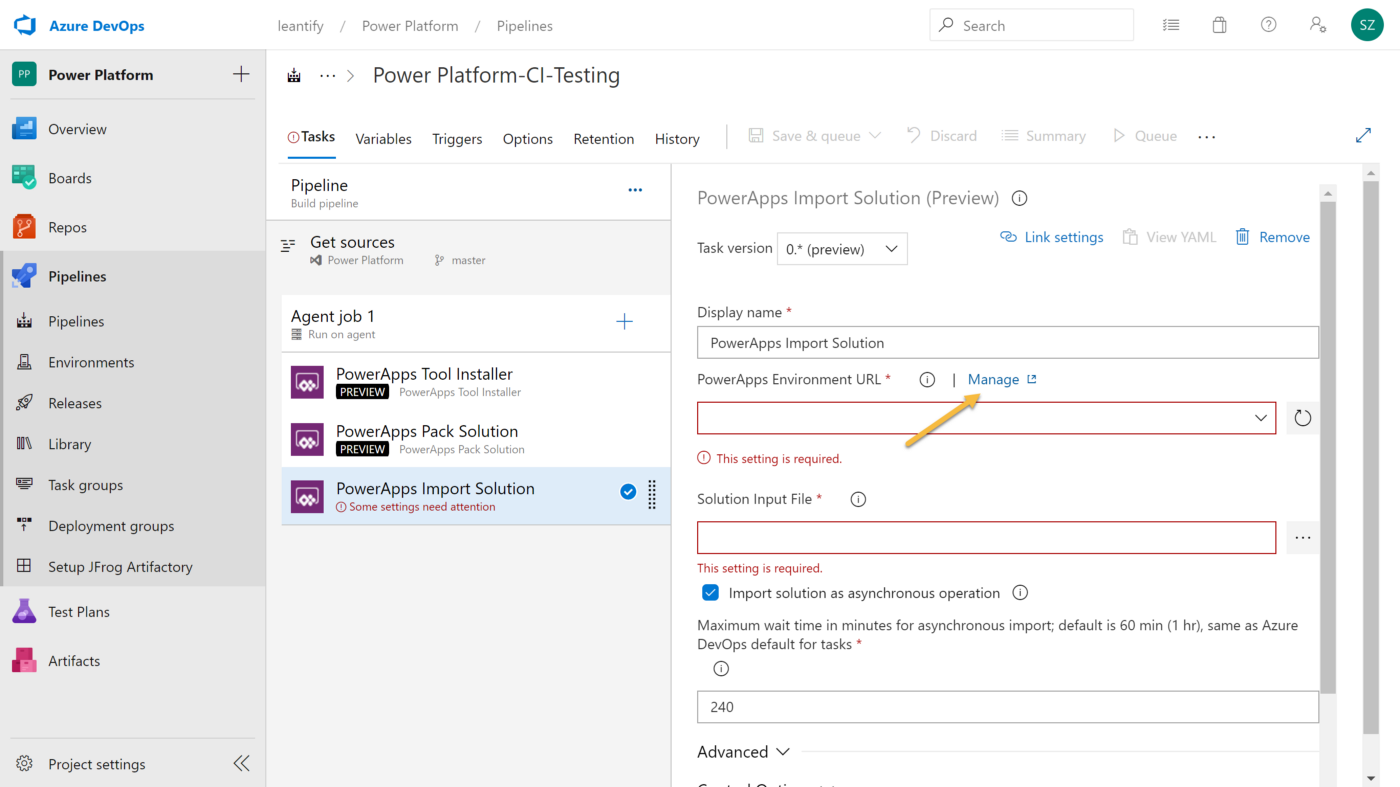
We configure it the same way as before but point to another Server URL. again, this can be any other Power Platform environment, like your development environment, your team’s environment, or your production/customer environment.
For the Solution Input File, we put the following:
$(Build.ArtifactStagingDirectory)\$(PowerPlatform.SolutionName).zip
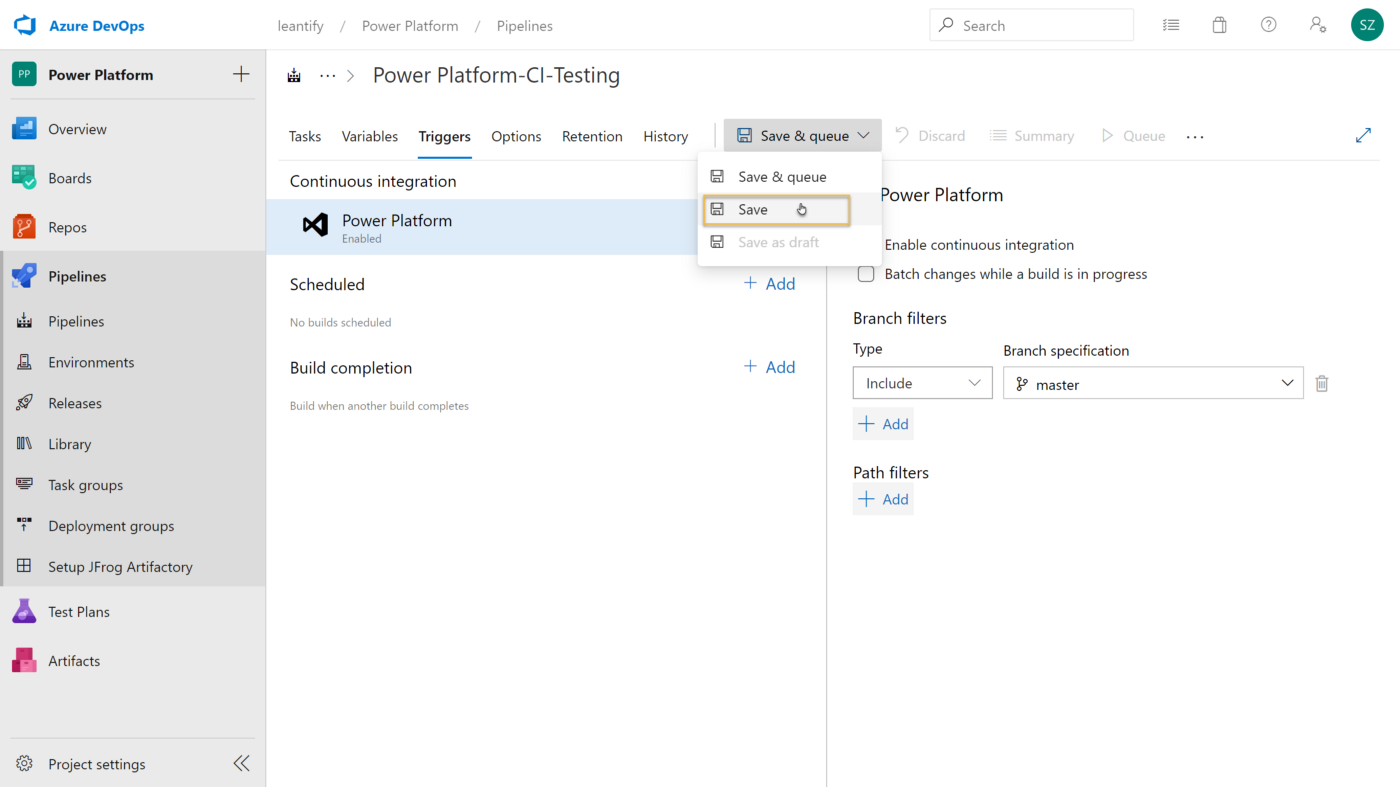
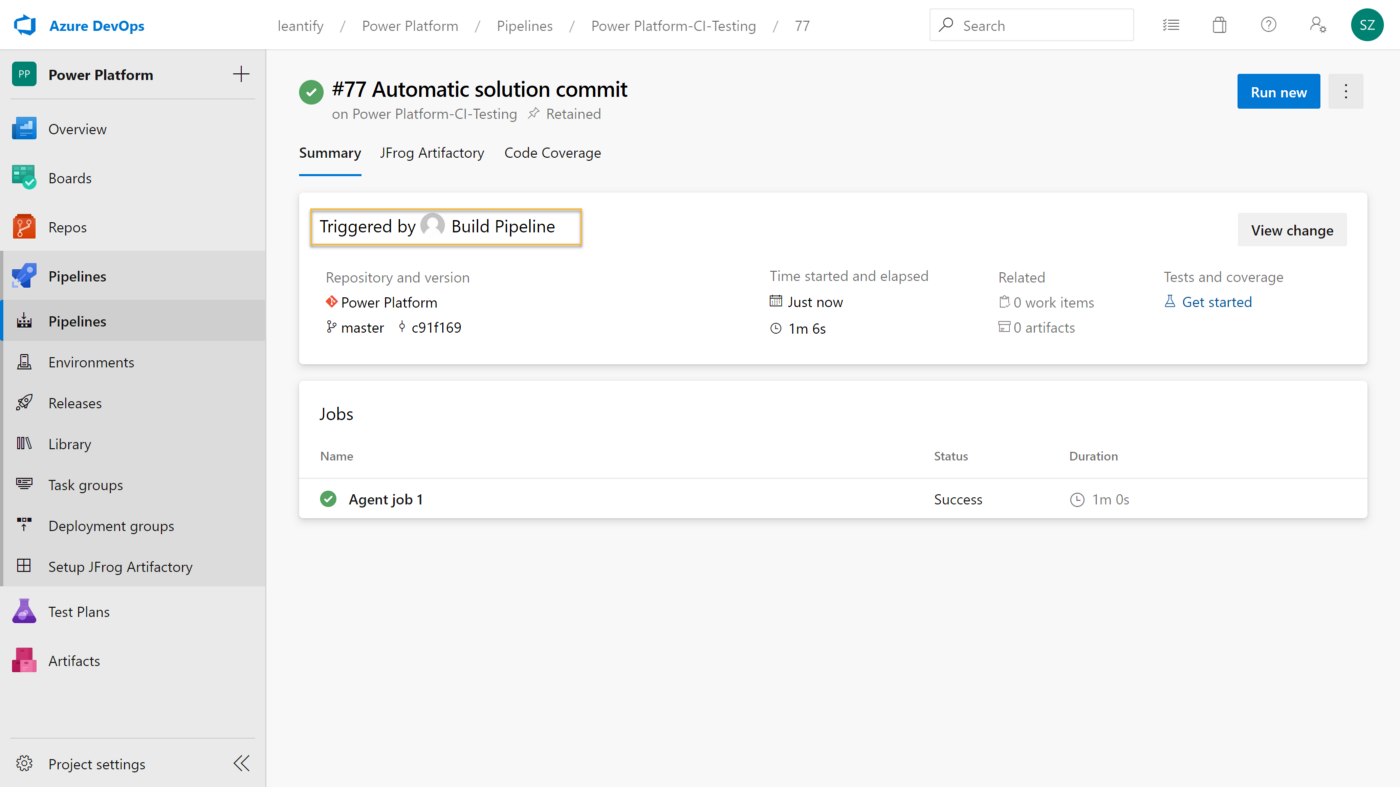
Now that we have the pipeline ready, we do two more configurations. We add the PowerPlatform.SolutionName as a variable, and we Enable continuous integration on the Triggers panel. The later forces the pipeline to run every time something gets committed to the master branch of your repository.

Save your pipeline, but don’t queue it.
To test the whole process, make any change to your Power Platform Solution and trigger the check-in pipeline manually. The second pipeline starts automatically when the first one has finished.
After everything ran successfully, go to your target environment and check for the solution to be created. Any subsequent run will update the solution in your target environment. You don’t need to do anything.
This is continuous delivery for no-code solutions.
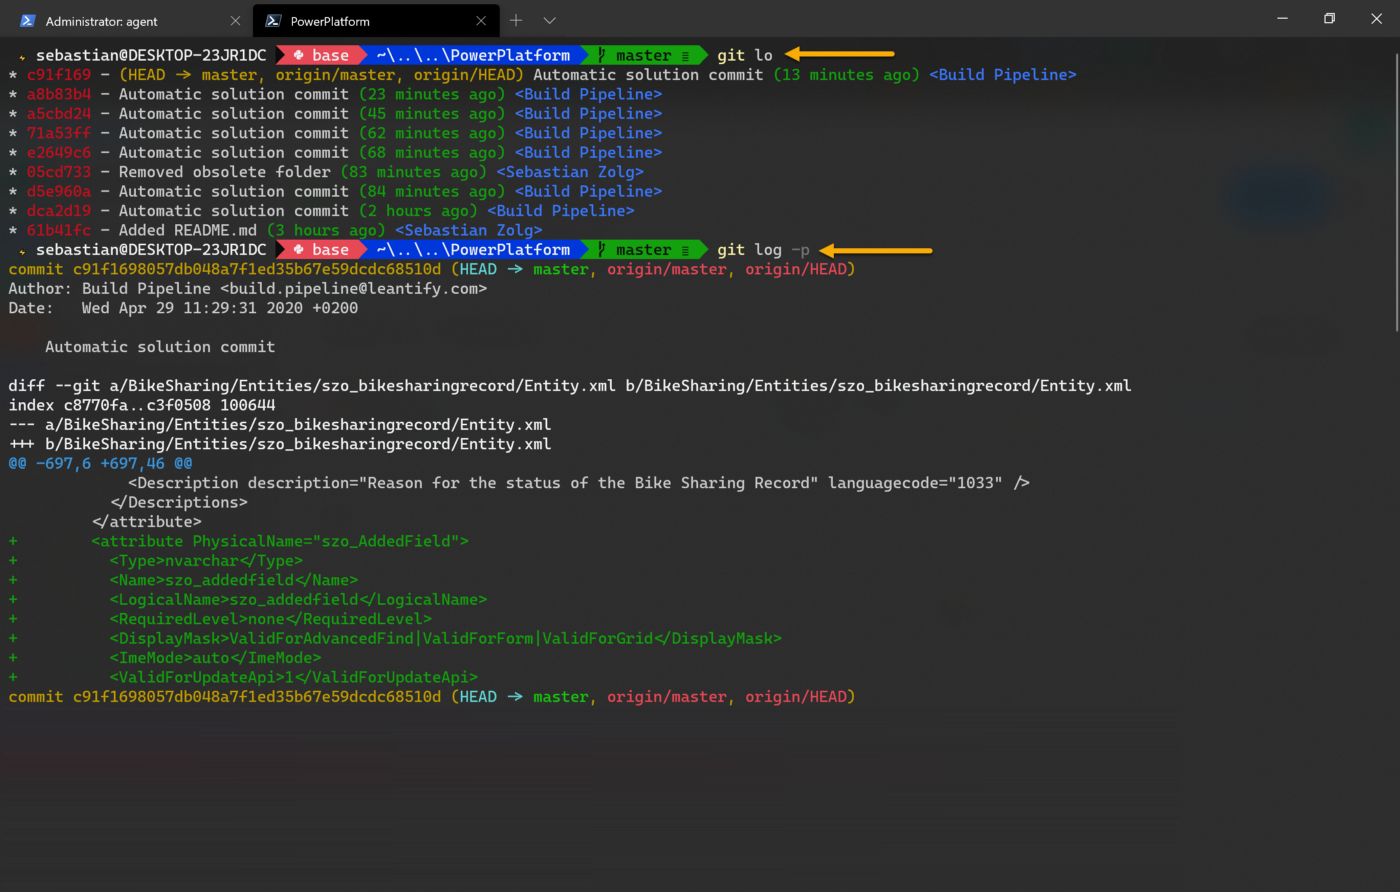
Bonus: Track with the git command line.
Now that we have everything under source control, you can track all changes using the git command line. Clone the repository and use commands like git log -p to see the most recent changes.